“Wine is one of the most civilized things in the world and one of the most natural things of the world that has been brought to the greatest perfection, and it offers a greater range for enjoyment and appreciation than, possibly, any other purely sensory thing.” – Ernest Hemingway
History
Wine is an ancient beverage. Archaeologists have unearthed wild grape seeds in places like Damascus, Syria, Byblos, Lebanon, and modern-day Jordan dating back as far as 8000 BCE. Cultivated grape seeds (identified by the difference in shape) dating to 6000 BCE were discovered at the Gadachrili Gora site near the village of Imiri in modern-day Georgia. Wine spread from its early origins across the ancient world, where it was a source of nutrition, trade, and even medicine. Hippocrates, sometimes called the father of medicine, used wine in most of his medical treatments. The Jewish Talmud speaks of wine, saying, “Wherever wine is lacking, drugs become necessary,” while a 6th century BCE Indian medical text describes wine as an “invigorator of mind and body, antidote to sleeplessness, sorrow, and fatigue… producer of hunger, happiness, and digestion”. Despite being a staple of the human diet, wine is not easily produced everywhere.
Vitis vinifera is the wine-producing species of grape. This species prefers a very specific climate. This climate is typically found in the regions we think of wine coming from; the Mediterranean (which includes such places as Spain, Southern France, Italy, and Greece), the Rhineland of Germany, Australia, New Zealand, and Napa Valley in California. There are many more regions that have been discovered to produce quality wine grapes. What is the rest of the world left to with to produce wine? Fruit.
Fruit Wine versus Grape Wine
Wine is defined as being the product of the fermentation of grape juice. Fruit wine is simply wine made from any other fruit besides grapes. The grapes of Vitus vinifera are one of the few fruits that naturally contain the correct balance of sugars, acids, and tannins to create well-balanced wine. Therefore, fruit wines are made by adding extra ingredients to the fruit juice to create a balanced and delicious wine.
Components of Wine
Wine is a complex beverage. There are nearly a thousand individual chemical compounds that make wine what it is. However, there are a handful of components that are most important and can be adjusted and controlled by the home winemaker.
Sugar: Sugar is the most important of all the components of wine. Without sugar, wine would never become wine. Sugar is the fuel for fermentation. Fermentation is the process by which the yeast, Saccharomyces cerevisiae, consumes sugar for energy and releases ethanol (the primary alcohol in wine, beer, and liquor) and carbon dioxide as a byproduct. Glucose and fructose are the primary sugars found in most fruits.
Acid: Acids are a diverse and complex class of chemical compounds. In the world of winemaking, the focus is on naturally occurring organic acids. Organic acids are responsible for sour and tart tastes in food and beverages. The most common acids found in fruits are malic acid, tartaric acid, and citric acid.
Tannin: Tannins are a class of unique biomolecules that contribute astringent (the dry, puckering mouthfeel associated with red wine and unsweetened tea) and bitter flavors to food and beverages. Tannins are found in a range of places, including tea leaves, grapes, berries, wood (oak barrels), and chocolate.

Fermenters of various sizes and materials.
Alex Ryan Thompson, ©2023, Clemson Extension
Winemaking Equipment
Primary Fermenter: The primary fermenter is the initial vessel in which you will add the ingredients for your recipe and allow fermentation to occur. Primary fermenters come in a variety of sizes, typically ranging from 1 to 7 gallons. Wine will become very active during primary fermentation and cause foam and fruit solids to rise to the top of the fermenter. Choose a fermenter that has a greater overall volume than the amount of wine you intend to produce (i.e., a 6-gallon fermenter for a 5-gallon batch of wine). ONLY use primary fermenters made of materials intended to be used for fermentation. Food-grade plastic or glass are the best choices. DO NOT ferment wine in any vessels not intended for winemaking. The fermentation process can potentially leech hazardous materials from the vessel into your wine.
Secondary Fermenter: The secondary fermenter is the vessel where the wine is allowed to complete its fermentation as well as mature and round out its flavors over time. Secondary fermenters are essentially the same type of vessel as primary fermenters. The difference lies in the size and material of the vessel. When choosing the proper vessel for a secondary fermenter, choose one nearest in volume to the exact volume of wine you intend to transfer to secondary fermentation (i.e., a 5-gallon fermenter for 5 gallons of wine). The reasoning for this is to minimize the amount of oxygen the wine encounters during secondary fermentation. Oxygen can cause a variety of negative effects on your wine, causing a sharp decrease in quality and can potentially lead to complete spoilage of your wine. Don’t worry about not having extra space for foam and fruit solids in your secondary fermenter. Wine in secondary fermentation will not be as active as it is in primary fermentation. Also, if you intend to let the wine sit in secondary fermentation for more than 14 days, choose a glass fermenter (sometimes referred to as a carboy) as opposed to food-grade plastic. Glass allows very little oxygen to penetrate the fermenter as opposed to plastic and allows the wine to mature longer in secondary.
Lids, Airlocks, and Bungs: All primary and secondary fermenters need some sort of lid. Wherever you purchase your fermenters should also supply the appropriate lids. Airlocks are small plastic devices that allow the carbon dioxide produced during fermentation to escape (otherwise, the fermenter would explode from the built-up gas inside) but does not allow air back into the fermenter. Airlocks need to be filled with a liquid to work properly. Plain water can mold over time, and alcohol (such as vodka) can evaporate too quickly. The best choice is a food-safe sanitizer solution (cleaners and sanitizers are discussed later). Bungs are round rubber plugs that seal the openings in fermenter lids where airlocks can be attached. Some bungs also function as lids to seal certain types of fermenters. Always make sure your bung and lid fit your fermenter and airlock properly.
Tubing, Siphons, and Racking Canes: Siphons are sections of plastic tubing used to carry liquids from one vessel to another. Tubing for winemaking needs to be made of clear, flexible food-grade plastic. Clear plastic allows one to visibly check the lines for cleanliness and liquid flow. Racking canes and auto-siphons are devices that attach to the transfer tubing and allow for easier siphoning from one vessel to another. Follow the manufacturer’s directions for proper racking cane or auto-siphon use.

Various airlocks, bungs, and lids.
Alex Ryan Thompson, ©2023, Clemson Extension
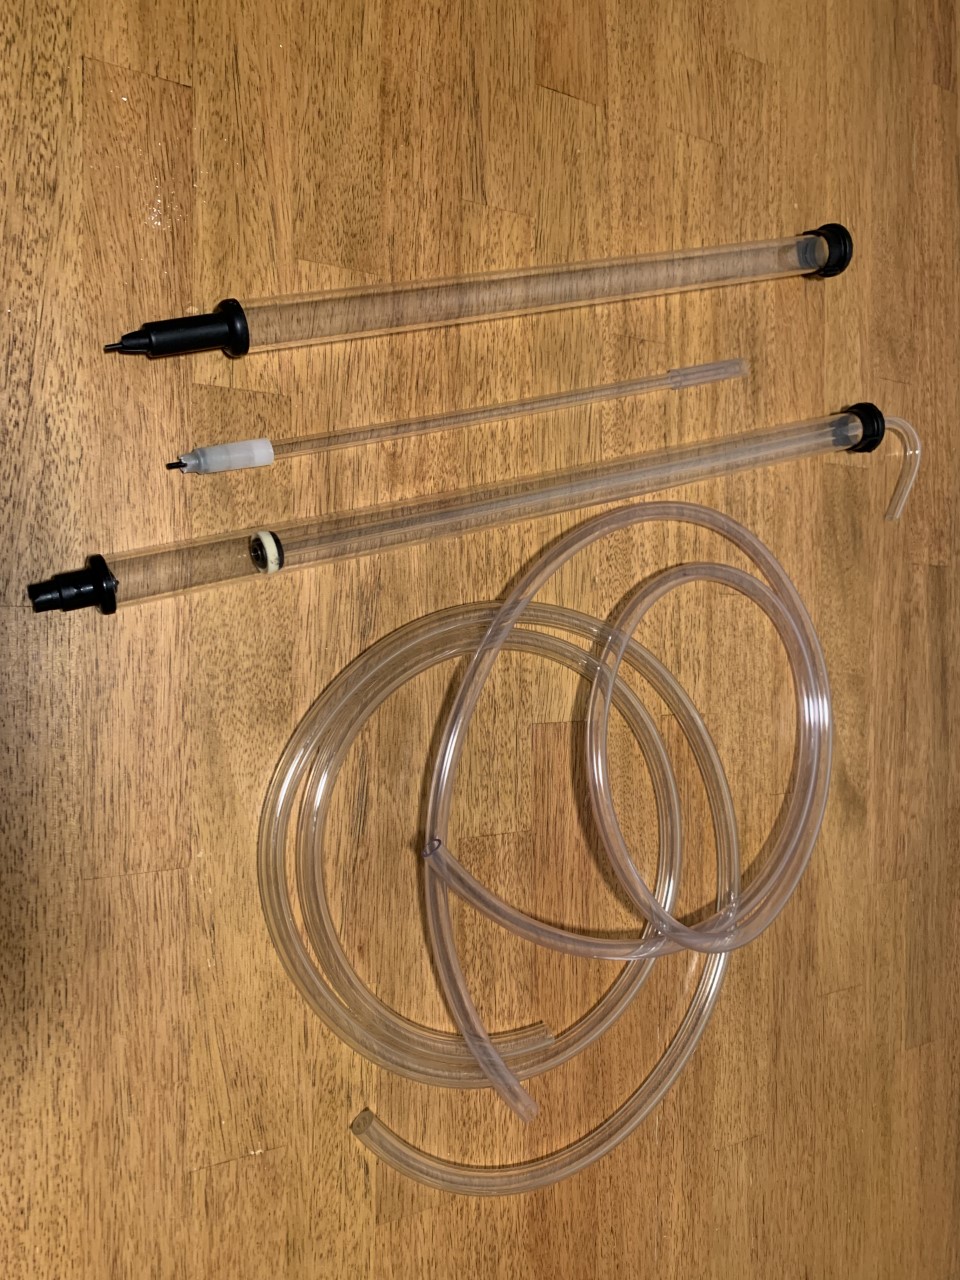
Assorted siphons, wine thieves, tubing, and racking canes.
Alex Ryan Thompson, ©2023, Clemson Extension

Cork, closures, double level corker, and bottles.
Alex Ryan Thompson, ©2023, Clemson Extension
Bottles: Standard wine bottles are 750ml. Demi bottles are 375ml, while magnum bottles are 1.5L. Wine bottles are typically made from brown, green, blue, or clear glass. Bottles used for storing homemade wine should be clean and free of any chips, nicks, or any other type of damage. Bottles used to store homemade wine should either be new or only ever used to store wine before. Screw-top wine bottles should NOT be corked; the glass around the neck is thin and may break when placing or removing the cork. DO NOT use bottles that have been previously used to store chemicals or any other non-food item.
Corks, Corkers, and other Closures: Corks are cylindrical stoppers made from the bark of the tree Quercus suber, known as the cork oak. Some modern wine corks are also made from a synthetic plastic-based material. Natural and synthetic corks can be purchased to close homemade wine. Used corks CANNOT be reused; corkscrews and other removal tools permanently damage the cork. Corks are typically labeled as number 7, 8, or 9 corks. This number refers to the diameter. Number 7 is used for demi bottles and smaller. Number 8 can be used for standard and magnum bottles that will be aged for a short amount of time. Number 9 corks are typically used for standard and magnum bottles and can be used to age wine for many years. Corkers are mechanical devices used to insert corks into bottles. There are two common types of wine corkers, floor corkers, and double lever corkers. Floor Corkers are large, free-standing presses that can be easily operated by one person. Double lever corkers are small, hand-held devices. Double lever corkers are much more affordable than floor corkers but require much more physical effort as well as a second person to stabilize the bottle during operation. Other types of wine closures include twist-cap closures and swing-top bottles. Twist cap closures can be used to reseal a screw-top wine bottle, while swing-top closures are typically attached to the bottle. Both twist-cap closures and swing-top bottles do not protect wine from oxygen as well as corks do, so they should be used for wine that will be consumed within one year.
Cleaning and Sanitizing Agents: Proper cleaning and sanitation are necessary to produce safe and quality homemade wine. Cleaning and sanitizing agents commonly sold by homebrewing shops and websites can also be used in home winemaking. Common cleaning and sanitizing agents (such as StarSan and B-Brite Cleaner), as well as tools and methods, are summarized in HGIC 3885, Cleaning and Sanitation for Homebrewer.
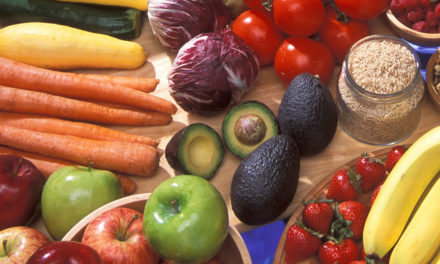
STEP 1: Choosing Fruit for Home Winemaking
Choosing fruit for homemade wine is simple. Pick the fruit you wish to make wine from (almost any fruit can be used to make homemade wine) and add it to the fermenter, along with sugar, tannins, acid, and yeast. Fruit used to make wine can be in several different forms. Fresh fruit can be used, but it needs to be crushed and juiced to create a fermentable product. This can be accomplished using a dedicated crusher and fruit press. This can also be done by hand chopping the fruits and processing them into juice or puree using kitchen appliances. Frozen fruits can also be used. Simply thaw the fruit as you would for any other culinary use and use them as directed by your wine recipe. Canned or packaged fruit purees are also an option. If using prepared fruit purees, make sure there are no added ingredients (sugars, preservatives, etc.) besides Vitamin C, also known as Ascorbic Acid. Any other added ingredients can inhibit fermentation.
There is no exact amount for how many pounds of fruit is needed to make 5 gallons of fruit wine (5 gallons is the common yield from most home winemaking recipes). The general guide is a range of 10-25 pounds of fruit per 5 gallons of wine. For a lighter-bodied wine with subtle fruit characteristics, use 10 pounds of fruit per 5 gallons. For a heavy-bodied, full-flavor wine, use 25 pounds of fruit per 5 gallons. As you begin to make your own wine, try using amounts across this range to find the ratio of fruit that you enjoy best.
STEP 2: Sterilizing Fruit for Home Winemaking
All fruit to be used in home winemaking needs to be sterilized prior to fermentation. This is necessary to kill off the wild yeast and bacteria present on the fruit. If these wild yeast or bacteria grow in your wine, they can cause highly unpleasant off-flavors or aromas that will severely impact the quality of your wine. Fruit to be used in home winemaking can be easily sterilized using Campden tablets. Campden tablets contain sodium/potassium metabisulfite. Sodium/potassium metabisulfite releases sulfur compounds into the wine that kill off any unwanted yeast or bacteria present.
To use Campden tablets in your homemade wine, crush as many Campden tablets as needed for the amount of wine you are making. Each brand of Campden tablets has different dosage ratios. Always use the manufacturers’ recommended dosage. Add these crushed tablets to the unfermented wine currently in the fermenter. Close the fermentation vessel and allow it to sit for 24 hours. After 24 hours, the Campden tablets will have sterilized the wine. Yeast can now be added to begin fermentation.
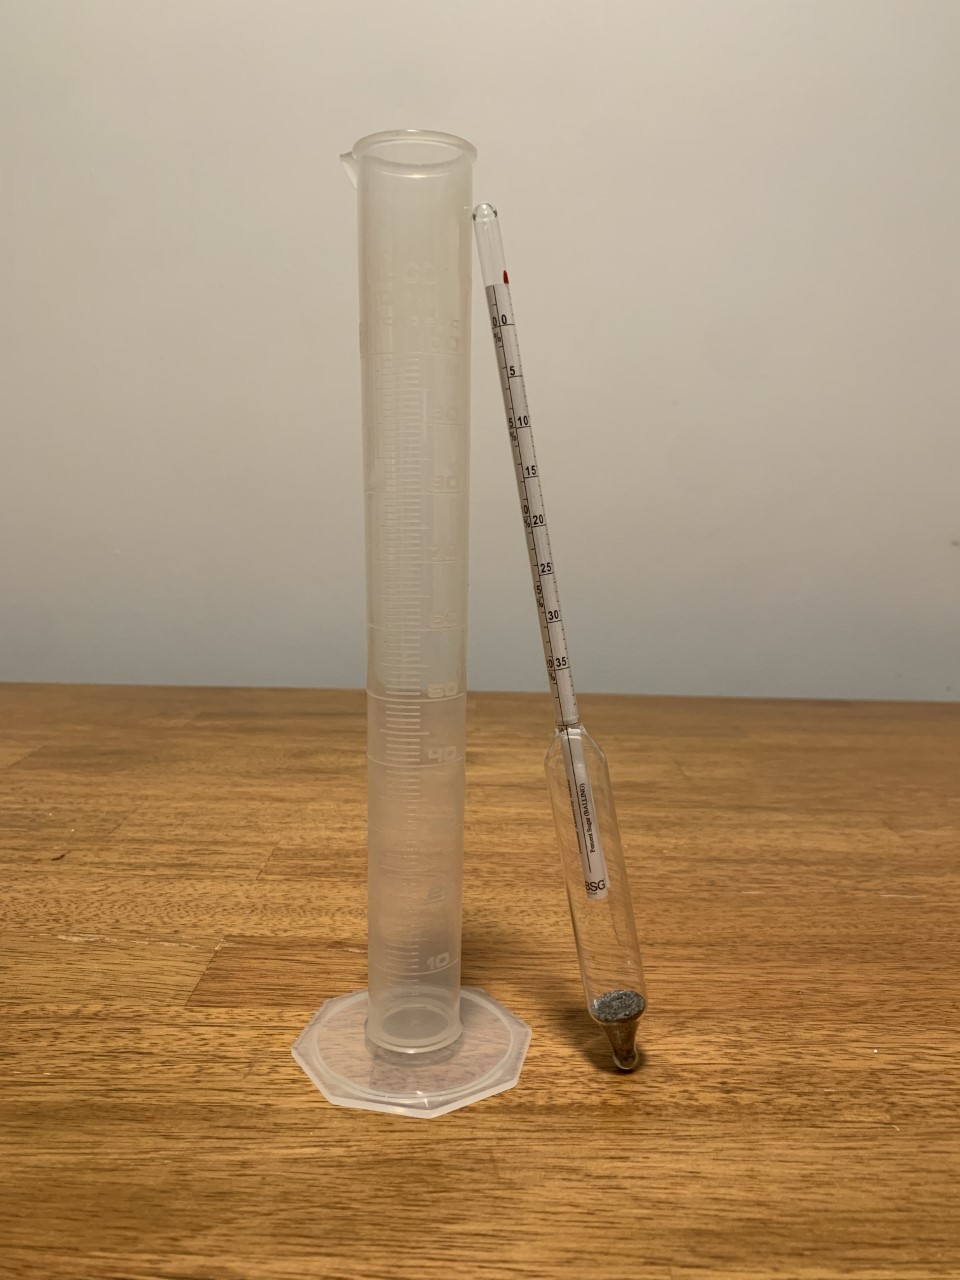
A hydrometer and graduated cylinder for testing.
Alex Ryan Thompson, ©2023, Clemson Extension
Sugar for Home Winemaking
Adding sugar is necessary to make quality fruit wine. As mentioned before, most fruits besides Vitus vinifera do not contain enough natural sugar to make wine. Therefore, extra sugar must be added. White table sugar (sucrose) is the most common and affordable option. Other sugar sources such as brown sugar, demerara sugar, turbinado sugar, agave nectar, maple syrup, or honey can also be added. However, these sugars are more expensive than table sugar and have stronger flavor profiles. If you intend to highlight the flavor of the fruit, use table sugar. If you want to compliment the fruit with the flavors of alternate sugar sources, then use whatever sugar source sounds tastiest to you!
As with the fruit ratios, there is no standard usage ratio for adding sugar to wine. Sugar is added to reach the desired original gravity (OG). OG is a measurement of the fermentable sugar in an unfermented wine. OG is measured using a device known as a hydrometer. To use a hydrometer, collect enough unfermented wine to fill a free-standing test tube (most hydrometers come in a tube that can be used to test samples). Place the hydrometer into the wine, lightly spinning the hydrometer as it sinks into the wine. Allow the hydrometer to settle in the liquid and read where on the hydrometer the liquid level settles. Wines should have an OG between 1.070 and 1.100. The higher the OG, the higher the final alcohol content of the wine.
Adding Tannins and Acids to Homemade Wine

Common winemaking ingredients that are available to home winemakers.
Alex Ryan Thompson, ©2023, Clemson Extension
Almost all fruits (asides from Vitus vinifera) will need added tannins and acid to create a balanced wine. Winemaking shops and websites will have both tannin and acid blends available. Most tannin blends for home winemaking source their tannins from grape skins or oak. Choose whichever you prefer and add it to your wine. Do not exceed the manufacturer’s recommendation on usage per gallon. Excess tannins can cause extreme astringency that can negatively impact quality. If you are using whole fruits or purees that include fruit skins, use a bit less tannin than recommended, as fruit skins naturally contain tannin.
Some older wine recipes will use tea as a source of tannin. These recipes typically call for adding ½ cup of strong brewed tea per gallon of wine. Tea naturally contains tannins like grape skins and oak; however, tannin content varies widely in tea. Using tannin powders meant for winemaking will produce a more consistent product.
Added acid is also necessary to create a balanced wine. Winemaking shops and websites sell various types of acid for home winemaking. Acids commonly used to adjust homemade wines are citric, tartaric, and malic acids. Citric and tartaric acids are available in their pure forms. Malic typically comes in an acid blend containing tartaric and/or citric. Choose whichever of these acid blends you desire (it’s best to experiment with a variety of acids to decide which you like best) and add pre-fermentation according to the usage rates recommended by the manufacturer.
Lemon juice can also be used in place of an acid blend. Add the juice of one lemon per one teaspoon of acid blend recommended for the recipe. The acidity of lemons can vary, so this method is less predictable than a dedicated acid blend. Also, some lemon characteristics will be noticeable in the finished wine. This may or may not be desirable, depending on the type of wine you are making.
Yeast Nutrient and Pectic Enzyme
Yeast nutrient is available at winemaking stores and websites. Yeast nutrient is added to unfermented wine to provide the yeast with all the necessary nutrients needed for a healthy growth cycle. A healthy yeast growth cycle produces a healthy fermentation. A healthy fermentation produces high-quality, flavorful wines. Unhealthy fermentations can cause off-flavors and aromas that can negatively impact the quality of your wine. Use yeast nutrients according to the manufacturer’s recommendations.
Pectic enzyme is available at winemaking stores and websites. Pectic enzyme (also known as pectinase) breaks down pectin naturally found in fruit. Pectin naturally forms gels. Anyone who has ever made homemade jam or jelly has most likely added extra pectin to create the characteristic texture of those products. In wine, pectin can cause the wine to become cloudy or even have a viscous or “ropy” mouthfeel. The pectic enzyme will break down any pectin found in your wine. Add pectic enzyme to wine according to the manufacturer’s recommendations.
Yeast for Home Winemaking
Yeast is crucially important to making homemade wine. In fact, without yeast, there would be no wine! Yeast converts sugars into alcohol (ethanol), carbon dioxide, and various other flavors and aromatic compounds in a process known as fermentation. Winemaking shops and websites will sell yeast made specifically for winemaking. Strains of yeast commonly used in red, white, and champagne-style wine are readily available. Choose the type of wine yeast that seems best and follow all manufacturer’s recommendations.
Do not use bread yeast or yeast meant for beer or cider. These yeasts cannot tolerate the higher concentration of alcohol found in wine and will die off before fermentation is complete. An incomplete fermentation will result in wine with low alcohol and high sugar content.
STEP 3: Primary Fermentation of Homemade Wine
Once your unfermented wine (containing fruit, sugar, tannins, and acid) has been sterilized using sodium/potassium metabisulfite for 24 hours, add your chosen yeast. Most packages of wine yeast are meant for 5 gallons of wine. Check the yeast instruction for exact usage amounts. Once your yeast has been pitched (added), close your fermenter, and keep it in a cool area (65℉ to 75℉) away from direct sunlight. Fermentation should begin within 12 hours. Active fermentation will typically cause a foam to form on the surface of the wine, as well as cause the airlock to bubble as carbon dioxide produced by the yeast escapes the fermenter. There is no need to push the rising fruit pieces back down into the fermenting wine. However, foam and airlock activity are not always visible during fermentation. The best sign of active fermentation is changes in the gravity of the wine. After 3 days of fermentation, collect a sample of the wine using a wine thief or siphon.
Check the gravity using a hydrometer. If the gravity has dropped from the OG, then fermentation is happening. Most wines will ferment to a final gravity (FG) of 1.005 to 0.999. Fermentation is complete when the gravity reading is consistent over a 3-day period.
STEP 4: Secondary Fermentation of Homemade Wine
Primary fermentation should finish within 5 to 14 days. Once the gravity is consistent, transfer (known in the winemaking world as racking) to a secondary fermentation vessel. Racking is most easily done using a racking cane which siphons the wine from one vessel to another. When racking wine, try to leave as much of the lees in the primary fermenter as possible. Lees is a winemaking term for the yeast and fruit sediment at the bottom of the fermenter. Lees is very bitter and makes for a cloudy and unpleasant tasting wine. Do not worry if some of the lees transfer into the secondary fermenter; it will settle out over time. During secondary fermentation, allow the wine to clarify. This may take a few days or a few weeks, depending on the type of wine. Also, continue to check the gravity of the wine every 3 days to monitor the progress of fermentation. The gravity of wine in secondary fermentation may or may not change. Once the wine tastes good to you and is as clear as you would like it (this is highly subjective from winemaker to winemaker), it is ready to be bottled.
STEP 5: Stabilizing and Sweetening Homemade Wine Before Bottled
Homemade wine needs to be stabilized for long-term storage and back-sweetening. Potassium sorbate is the most used stabilizer for homemade wine. It is readily available at winemaking stores and websites. Add potassium sorbate at bottling according to the manufacturer’s recommendation. Wine that has not been stabilized can potentially begin to ferment again during storage. This can cause wine bottles to shatter due to the carbon dioxide produced during fermentation not being able to escape the bottle.
After adding potassium sorbate, wine can also be back sweetened. Back sweetening can make a wine more balanced and drinkable, as the added sugar will highlight the fruit flavors in the wine. Only add sugar to stabilized wine. Sugar added to wine that has not been stabilized will begin to ferment again and will cause the bottle to shatter. There is not a general ratio of adding sugar to wine. The easiest way to test how much sugar needs to be added is to add sugar to a small amount of finished wine. A good place to start is ½ teaspoon into ½ cup of wine. Taste the wine after adding the sugar. Adjust the amount up or down until it tastes how you like it. Once you have the ratio determined, calculate how much sugar needs to be added to the full batch.
STEP 6: Cleaning Bottles for Homemade Wine
Bottles meant to hold homemade wine can be cleaned in one of several ways. Bottles can be washed in a dishwasher using a sanitation cycle and held there until bottling time. Bottles can also be cleaned using a bottle brush or bottle washer along with warm soapy water. Thoroughly rinse the bottles and spray the inside using a no-rinse sanitizer.
STEP 7: Bottling Homemade Wine
Once the wine has achieved the flavor, alcohol content, and clarity you desire, it is time to bottle. Rack the wine from a secondary fermenter into a bottling bucket. Bottling buckets have an opening for a spigot drilled into them. From these spigots, bottling nozzles or guns can be attached. Bottling nozzles or guns have spring-operated valves to only allow wine to freely flow when pressure is applied. Thoroughly clean and sanitize your bottling equipment according to the instructions of the cleaning and sanitizing agents being used.
Prep corks by soaking them in warm water with one crushed Campden tablet per gallon of water. Soaking serves two purposes. First, the warm water softens the corks making it easier for them to slip into the bottleneck. Second, the Campden tablet sterilizes the corks.
Fill each bottle using the nozzle or gun until the wine just reaches the top of the bottle opening. When the nozzle or gun is removed, the wine in the bottle will be at the correct level for storage. Immediately cork the wine, and label it. The label should include the type of wine, alcohol content, and bottling date.
STEP 8: Storing Homemade Wine
Fruit wine can be stored anywhere you would store commercially purchased wine. Wine cellars, kitchen cabinets, closets, and pantries are all great options. It is not recommended to store wine in sheds or buildings without temperature control. Large swings in temperature can negatively impact your wine.
Fruit wines do not benefit from long-term aging like traditional grape wines do. Fruit wine quality will improve with a small amount of aging (1 to 2 months after bottling) but is drinkable immediately after bottling. Fruit wines will last over a year, but the quality may deteriorate after this time (if they last that long!)
Conclusion
In summary, making homemade wine is a highly satisfying experience and can be easily done with some basic equipment and a bit of patience. So, find some fresh fruit, gather your equipment, and get ready to share the fruits of your winemaking labor with your friends and family!
References:
- Garey, Terry A. The Joy of Home Winemaking. William Morrow Paperbacks. New York. 1996.
- Johnson, Hugh. Vintage: The Story of Wine. Simon & Schuster. New York. 1989.
Originally published 02/23