
There are four aspects of turfgrass establishment: selecting a turfgrass that is adapted for that particular area; preparing the soil for planting; planting, which may include seeding, sodding, plugging, or sprigging; and care and maintenance of the newly planted lawn to ensure successful establishment.
Turfgrass Selection
Proper turfgrass selection is one of the most important factors in the successful establishment of a home lawn. Not all species and cultivars will perform equally when placed in the widely differing geographical areas and local climates found in South Carolina. The turfgrass you select should be adapted to your area and meet the level of lawn quality you desire.
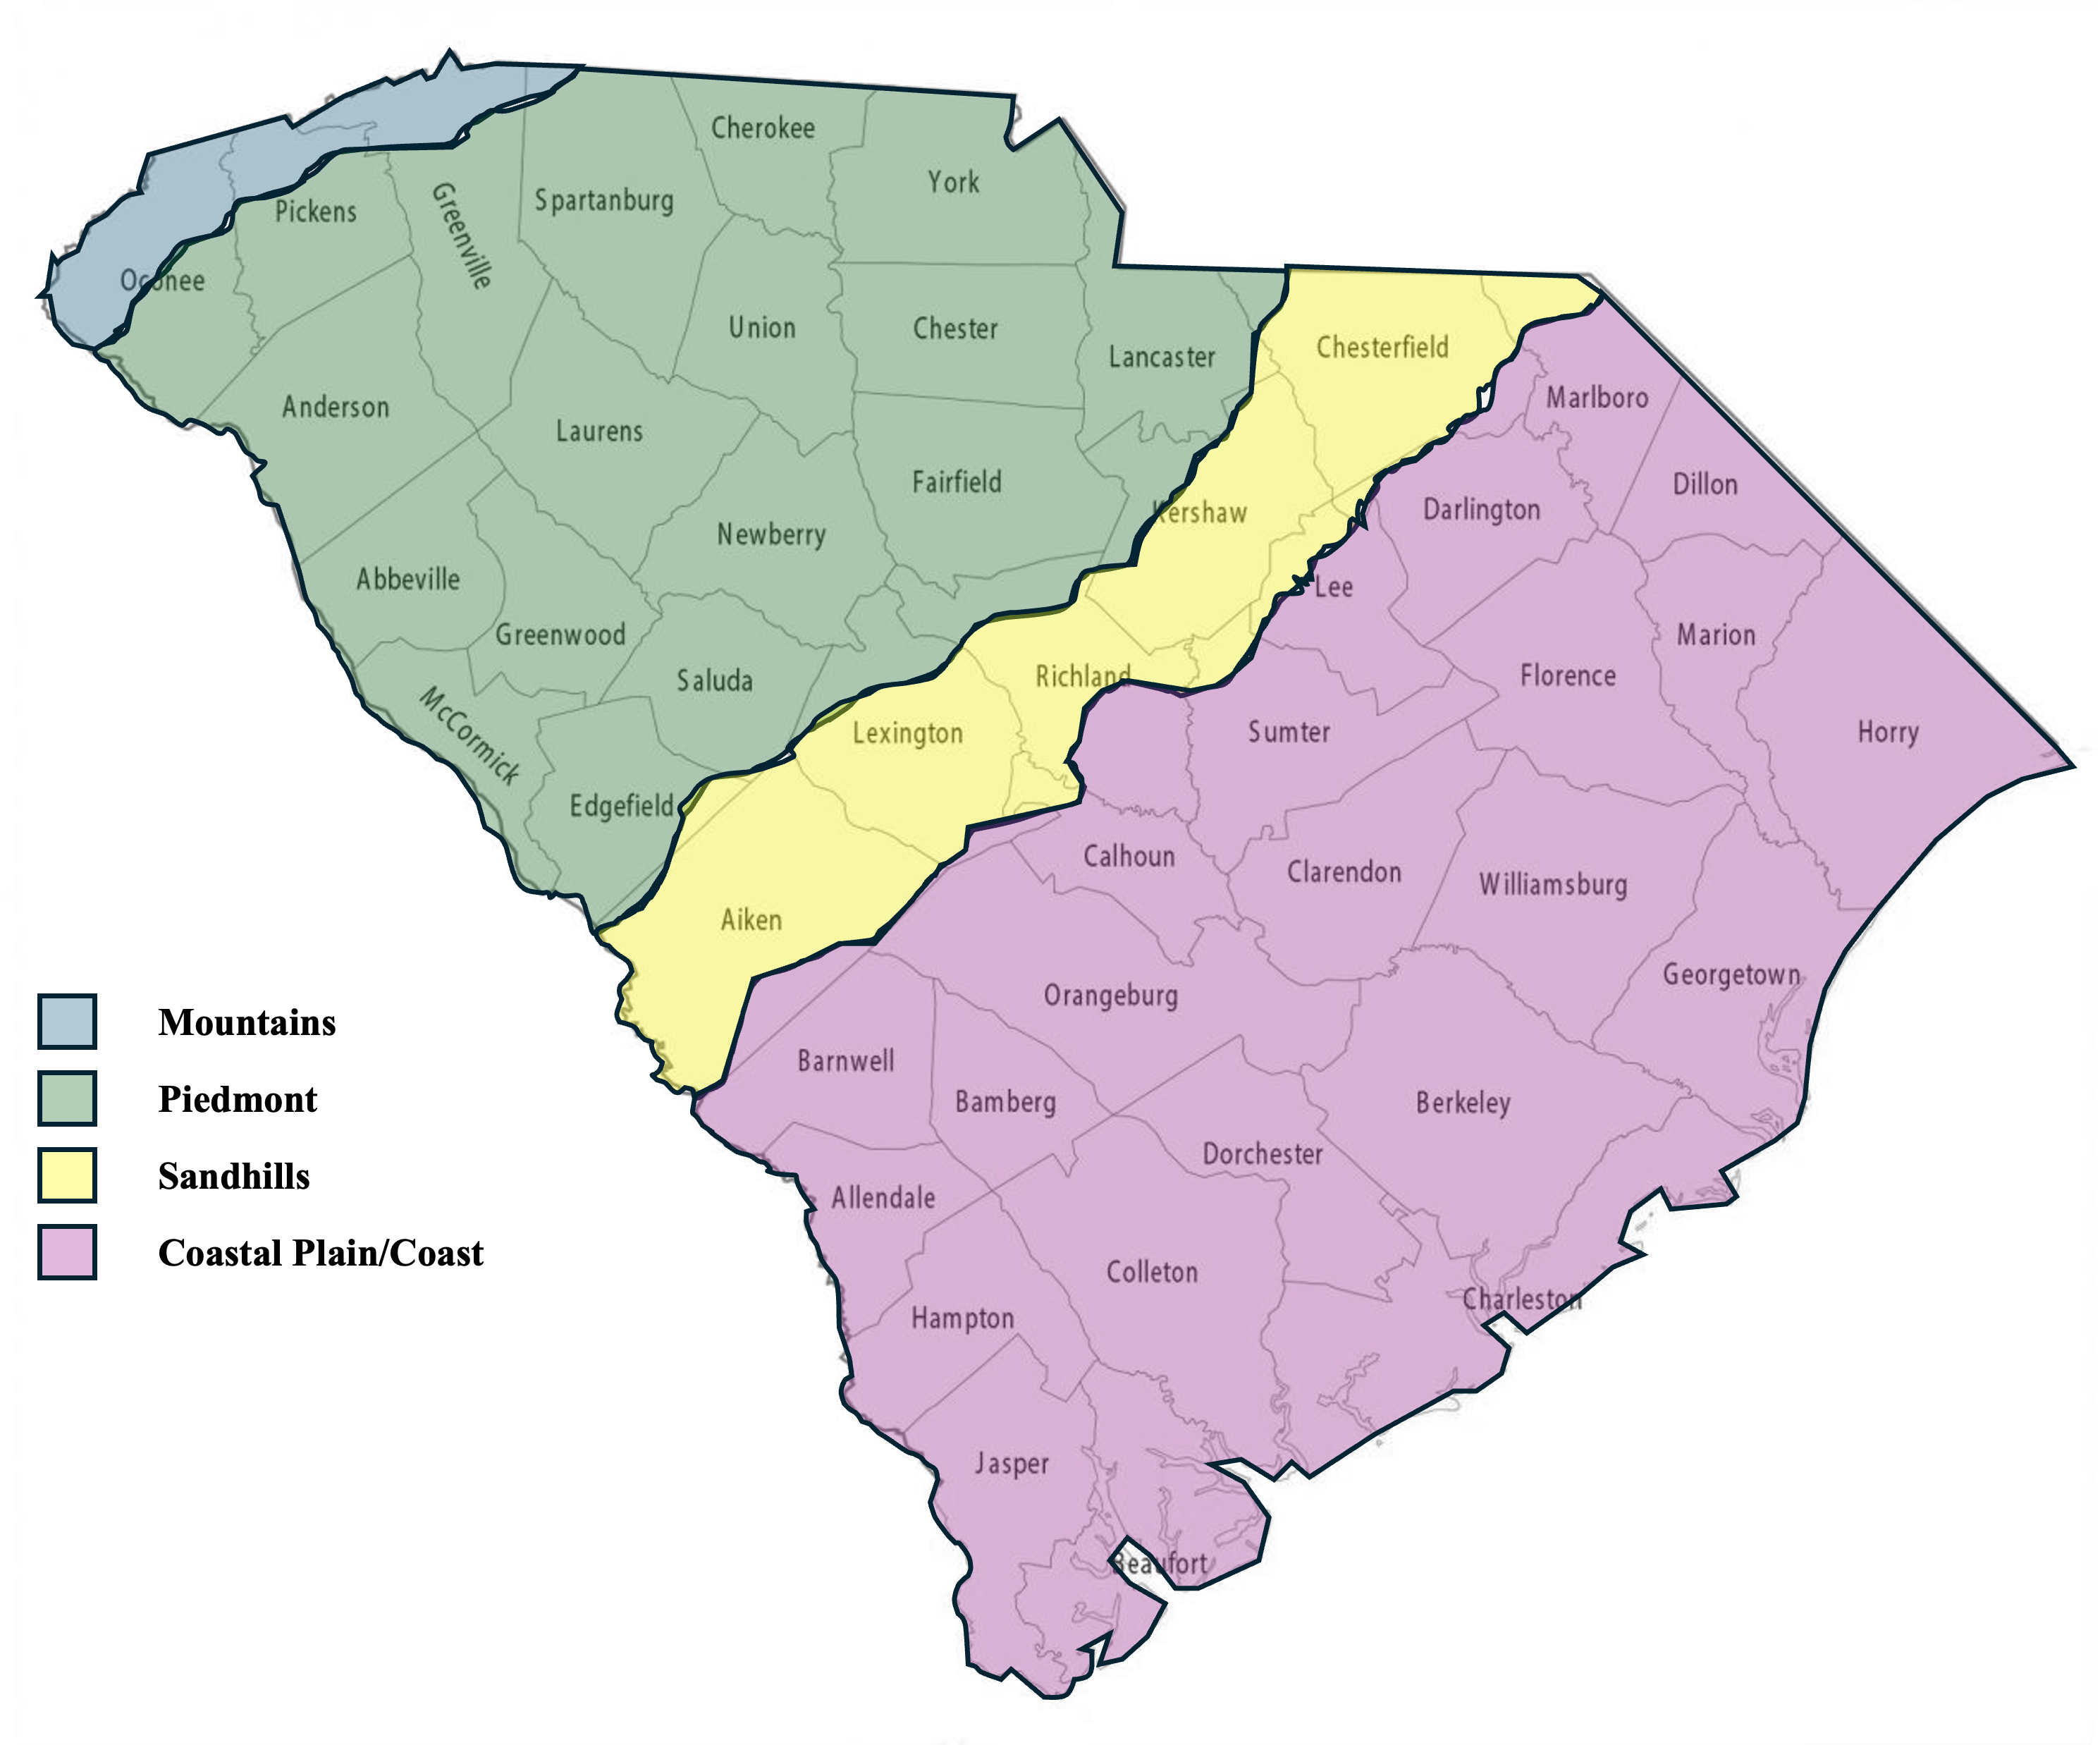
Geographic location, in addition to microclimates in a landscape, greatly influences the species and cultivars of turfgrass available to homeowners.
Adam Gore, ©2024 HGIC, Clemson Extension
Soil Preparation
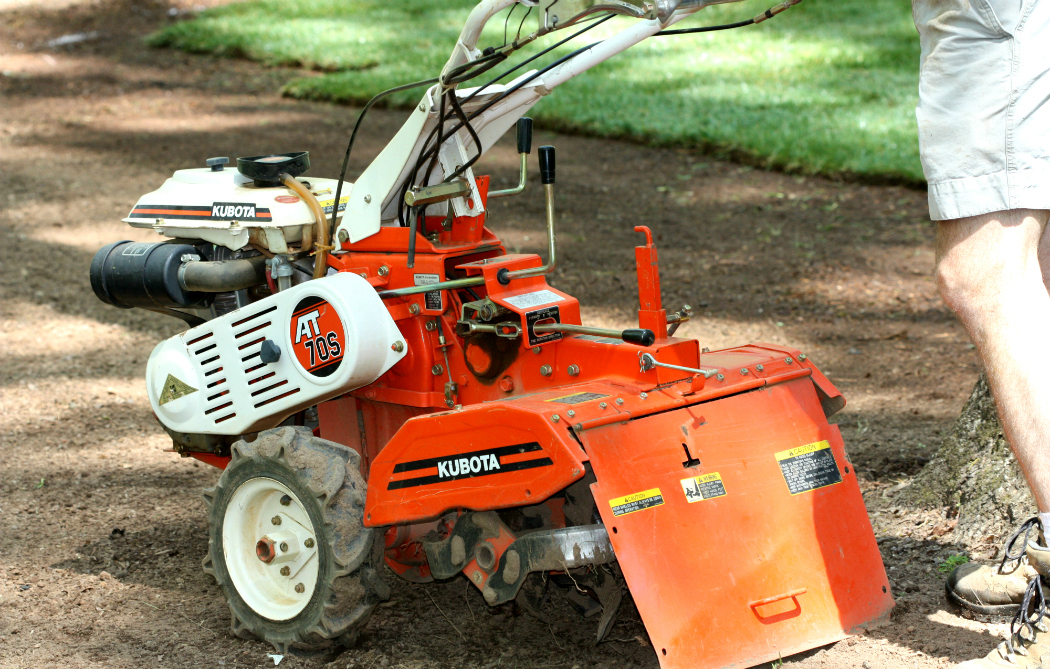
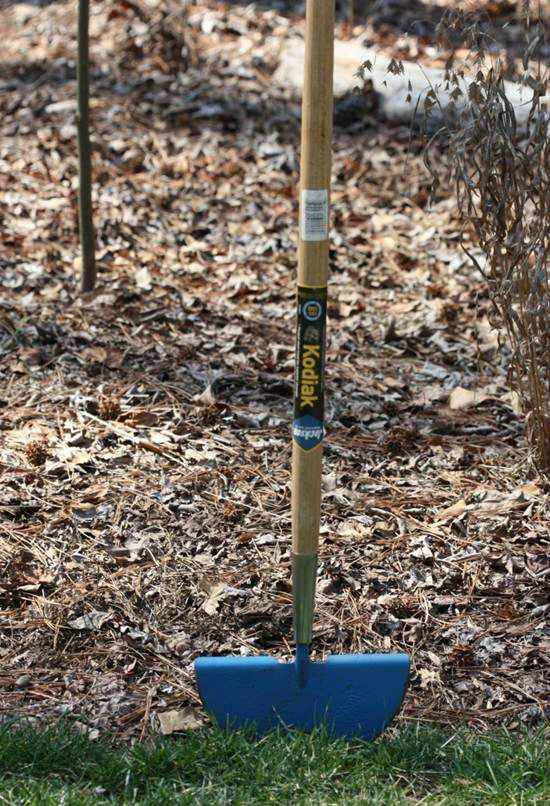
For small lawn areas, a walk-behind tiller can adequately loosen the soil and incorporate needed amounts of lime, fertilizer, and organic matter.
Joey Williamson, ©2015 HGIC, Clemson Extension
The key to establishing a lawn successfully is to create a growing foundation that is conducive to plant growth. Soil preparation is the same whether planting seed, sprigs, stolons, or sod.
Soil Test: Soil testing will determine whether the soil pH and nutrient levels are within sufficient ranges that favor turfgrass growth. The soil test report will indicate any needed amounts of fertilizer and/or lime. Soil testing should be performed 2-3 months before the anticipated planting or seeding date to allow time for any necessary or recommended soil amendments to be added.
Clean & Rough Grade: Remove all debris from the location to be planted. This includes rocks, bottles, large roots and old tree trunks. If extensive grading is needed, remove the topsoil and stockpile it for replacement after the rough grade is established.
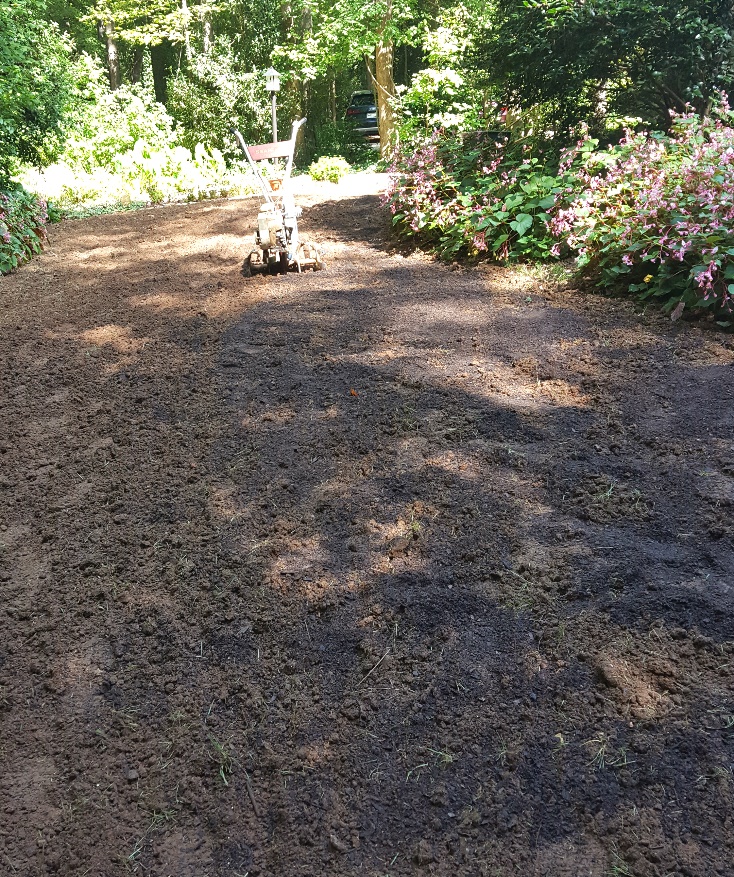
Additional organic matter is tilled into the topsoil for improved soil aeration and drainage.
Joey Williamson, ©2019 HGIC, Clemson Extension
The subsurface may become compacted during rough grading, especially if the ground is wet. This compacted layer must be broken up. A spring-tooth harrow works well on lightly compacted soils; a small rototiller may be needed for more heavily compacted sites.
Deep Tillage: Rototilling loosens compacted soil and improves the speed and depth of rooting. A tractor-mounted or self-propelled tiller will adequately till the soil. Take care not to destroy the existing trees in the lawn. Cutting too many tree roots during soil tillage can severely damage or kill a tree. Trees can also be suffocated by deeply covering the roots with soil. If additional soil is necessary at a tree base, construct a “tree well.”
Replace the Topsoil: Once the subsurface is properly graded, return the topsoil and spread uniformly over the entire area. In more clayey soils or areas where topsoil has been eroded, root establishment may be slowed. In this situation, the addition of topsoil may be necessary, adding up to 3 inches. Improve existing soil by adding and deeply tilling in about a 1-inch-deep layer of organic matter. This improves water retention in sandy soils, enhances drainage in clay soils, and reduces fertilizer leaching. Do not attempt to till sand into clay soils, as this may cause increased firmness and decreased drainage.
Fertilization & Liming: Apply any necessary amounts of fertilizer and lime recommended by the soil test and work these into the upper 4 to 6 inches of soil. If the soil test indicates a high pH, a maximum of 20 pounds of sulfur per 1000 square feet of lawn can be tilled into the soil to lower the pH into the correct soil pH range. In the absence of a soil test, a general recommendation is to use a slow-release, “starter-type” fertilizer specially formulated to contain the higher amounts of phosphate that are required by turfgrass seedlings during establishment. Apply 1½ to 2 pounds of actual nitrogen per 1,000 square feet prior to planting.
The slow-release fertilizers should be tilled into the soil, but they can be applied at planting. The nitrogen in these fertilizers will typically last 2 months. See Table 1 for examples of brands and rates.
Table 1. Residential Lawn Starter Fertilizers and Rates for Nitrogen.
| Brand | Analysis | Suggested Rate per 1000 Sq. Ft. of Lawn |
| Scott’s Turf Builder Starter Fertilizer | 24-25-4 | 6 to 8 |
| Vigoro Lawn Starter Fertilizer | 23-23-3 | 6 to 8 |
| Sta-Green Lawn Starter Fertilizer | 18-24-6 | 8 to 11 |
| Pennington Lawn Starter Fertilizer | 18-24-6 | 8 to 11 |
| GroundWork Starter Fertilizer | 18-24-6 | 8 to 11 |
| Lesco Professional Starter Fertilizer | 18-24-12 | 8 to 11 |
| Lebanon ProScape Starter Fertilizer | 16-25-12 | 9 to 12 |
| Southern States Starter Fertilizer | 10-25-12 | 15 to 20 |
| Bonide Lawn Seed Starter Fertilizer | 10-25-12 | 15 to 20 |
| Ferti-lome New Lawn Starter | 9-13-7 | 17 to 22 |
Some of the coastal soils may naturally contain very high amounts of phosphorus, such as in Horry, Georgetown, Charleston and Beaufort county soils. In lieu of a regular starter fertilizer, which is high in phosphorus, substitute a slow-release centipede lawn fertilizer (15-0-15 with iron) to incorporate into the soil at the rate of 9-12 pounds fertilizer per 1000 square feet of all lawn grasses. Because of the greater sensitivity of centipedegrass to high amounts of phosphorus in the soil, it is very important to have the soil tested. If the soil test reveals levels of phosphorus that are medium or above, use a slow-release 15-0-15 as the starter fertilizer at planting.
If a water-soluble, quick-release source of nitrogen is used, do not apply and mix in more than 1 pound of actual nitrogen per 1,000 square feet. An example and amount of a fast-release, “starter-type” of fertilizer is 20 pounds of a farm grade 5-10-10 fertilizer per 1,000 square feet of lawn. If a 5-10-10 is unavailable, use 10 pounds of 10-10-10 per 1000 square feet of lawn. The fast-release fertilizers should be tilled into the soil pre-plant. The nitrogen in most quick-release farm fertilizers will typically last one month. These initial fertilizer applications are for use in soils that are low in phosphorus and potassium.
Final Grading: After the fertilizer and lime (or sulfur) have been worked into the soil, rake the soil to remove rocks, roots, and sticks, and to make the soil as smooth as possible before seeding or sodding. Remember that the sod has a layer of soil on the bottom, and this height must be taken into account if laying sod next to a walkway or driveway. Keep the soil level an inch or so lower than the concrete or asphalt. Firm the soil by rolling with a water ballast roller before seeding, sodding and plugging. The best soil for seeding has a granular texture with small clods of soil varying from one-eighth inch to three-quarters inch in size. However, if the area is to be sprigged, the soil should remain loose in the upper 2 to 3 inches so a portion of each sprig can be set (pushed) into the soil. Once the soil is properly prepared, it is time to plant.
Seeding

Rake the soil with a steel or hard rake after tilling for a smooth lawn bed.
Joey Williamson, ©2019 HGIC, Clemson Extension
For successful seeding and establishment of warm-season grasses, a target date of May 1-14 is appropriate for all parts of the state. Planting earlier increases the risk of encountering below optimal soil temperatures, which will slow development and increase the potential of seed rot diseases, while planting later increases the risk of drying out during the summer heat. Cool-season grasses are best established in mid-late September. By seeding at these times, plants are allowed time to develop resilient root systems and carbohydrate storage before encountering severe and stressful weather conditions.
Successful establishment from seed can be heavily impacted by the quality of seed that is purchased. Law requires that each container of seed have a tag listing the turfgrass species and cultivar, purity, percent germination and weed content. Purity indicates the amount (as a percentage) of the desired seed as well as other seed and inert matter. Germination percentage tells the amount of seed expected to germinate under optimum conditions. The quantity of weed seeds is also listed. Try to purchase seed that has a purity of 90 percent or higher and a germination of 85 percent or higher.
Many seeding methods are used, ranging from planting by hand to using mechanical equipment for large turf areas. Evenness of seed distribution is important from the standpoint of overall uniformity. The seedbed should be well-prepared and leveled. Rake the entire area with a garden rake. Apply the seed mechanically, either with a drop-type or rotary spreader. Mechanical seeders provide a more uniform distribution of seed than hand seeding. For the best distribution of seed, sow one-half the required amount in one direction and apply the remainder at right angles to the first seeding. For very small seed like centipedegrass or bermudagrass, it may be helpful to mix the seed with a carrier such as corn meal, grits or an organic fertilizer to distribute the seed evenly.
With a rake, mix the grass seed with the top one-quarter inch of soil. Then, roll the seedbed with a light or empty water-ballast roller to ensure good seed-to-soil contact. Applying a mulch over freshly seeded areas is a common practice in areas where erosion, moisture retention or soil crusting are potential issues. The most commonly used mulch is straw. However, it is important to use weed-free straw. One bale of straw (60 to 80 pounds) will cover about 1,000 square feet. Straw can be removed when the turf reaches a height of 1 to 1½ inches or can be left to decompose if it is not spread too thickly. Peat moss and aged sawdust do not make good mulches for seeded lawns. These materials compete with the seed for water and are slow to decay.
Water the lawn as soon as possible after seeding with a goal of maintaining sufficient water to a depth of 2-3 inches in the soil.

Wheat straw should be spread over the newly seeded areas at 1 bale of straw per 1000 square feet of lawn. The straw will slightly shade the seed and hold moisture to prevent the seed from drying out.
Joey Williamson, ©2015 HGIC, Clemson Extension
Care of the Newly Seeded Lawn
Irrigation: Proper watering is the most critical step in establishing turfgrasses from seed. Apply water frequently so that the soil is moist, but not excessively wet, similar to a wrung-out sponge. Supplying water two or three times a day in small quantities for about two to three weeks will ensure adequate moisture for germination. If the surface of the soil is allowed to dry out at any time after the seeds have begun to swell and before roots have developed, many of the seedlings will die. As the seedlings mature and the root system develops, the frequency of waterings can be decreased, but the volume should be increased so that the entire root zone is moistened, not just the soil surface.
Care after Germination of Seed
During the establishment phase, a number of practices can be employed to help ensure a uniform, dense turf. A combination of mulching and irrigation is the key factor in successful turfgrass establishment. If a straw or hay mulch is used, be sure to monitor the grass seedlings for shading. If the new seedlings show a yellowing, lightly rake away some of the mulch.
Mowing: Begin normal mowing practices when the turfgrass seedlings reach a height one-third higher than the normal mowing height. It is important to maintain a sharp cutting blade to avoid pulling these seedlings out of the soil.
Fertilization: A light application of nitrogen fertilizer made when the seedlings are between 1½ and 2 inches tall will enhance the establishment rate substantially. Apply about one-half pound of actual nitrogen per 1,000 square feet watered into the soil. Avoid excessively high nitrogen fertilization.
Irrigation: The surface of the soil where seeds are germinating and seedling growth occurs should be moist at all times. The goal is to water often enough to keep the seedbed moist but not saturated, until the plants can develop sufficient root systems to take advantage of deeper and less frequent watering. Soils that have not been mulched will tend to dry out quickly. Less irrigation will be needed if mulch is used. The quantity of water applied will be small and should be maintained for at least three weeks following planting. As the turfgrass matures, reduce irrigation to a maintenance level to promote a deep root system.
Weed Control: Timing of weed control practices is also critically important once seeds have germinated. Most herbicides are somewhat toxic to newly germinated turfgrass plants. Delay postemergence applications of a herbicide for weed control as long as possible after seeding. Follow recommendations found on pesticide labels closely as far as timing of application and planting. Diligent care of the young lawn during the first two or three months is important for its overall success.
Vegetative Planting
Vegetative planting is simply the transplanting of large or small pieces of grass. Solid sodding covers the entire seedbed with vegetation. Spot sodding, plugging, sprigging or stolonizing refer to the planting of pieces of sod or individual stems (stolons) or underground runners (rhizomes).
Several warm-season turfgrasses are sterile, requiring establishment by planting vegetative plant parts due to their inability to produce viable seed. Exceptions to this include varieties of centipedegrass, carpetgrass, common improved bermudagrass, and Japanese lawngrass (Zoysia japonica), which can be established from seed.
Sodding: Sodding is more expensive than sprigging or plugging, but it produces a so-called “instant” lawn. It is recommended where quick cover is desired for aesthetic reasons or to prevent soil erosion. Establishment procedures for sod include soil preparation, obtaining sod of high quality, transplanting, and post-planting care.
Soil Preparation: Soil preparation for sodding is identical to that for seeding.
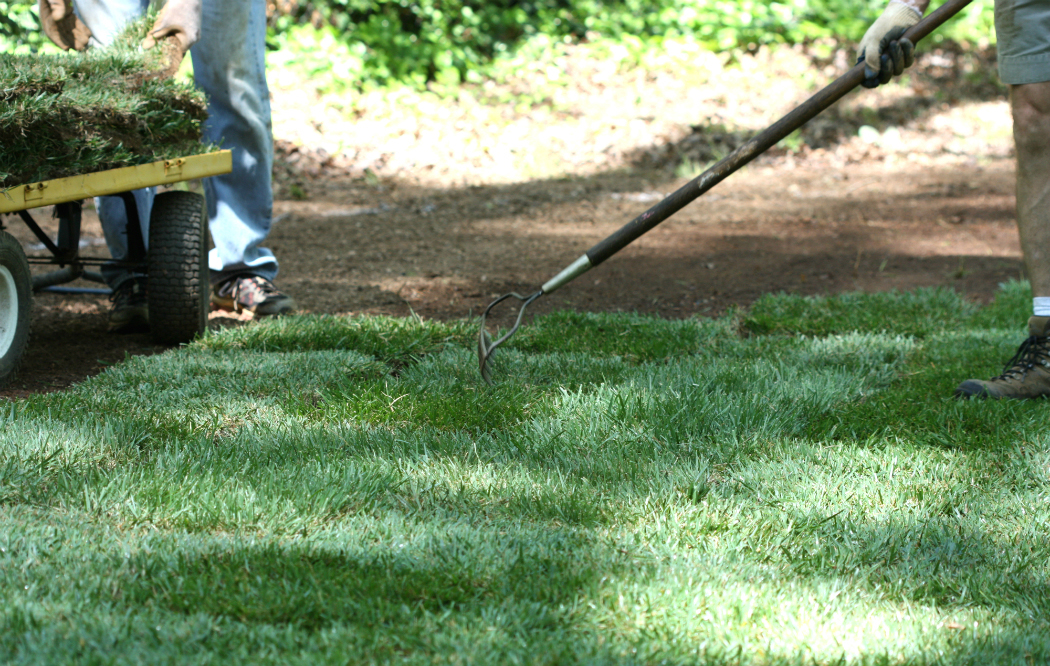
Sod is purchased in rectangular slabs or small rolls. Carry the sod from the pallets on a cart or wheelbarrow, and use a steel rake to position each piece firmly against adjacent sod pieces. A long-handled edging tool can be sharpened, and this makes for quick edging on curved sections of lawns.
Joey Williamson, ©2015 HGIC, Clemson Extension
Joey Williamson, ©2015 HGIC, Clemson Extension
Sod Transplanting: The primary objective in sod transplanting is to achieve as quick a rooting into the underlying soil as possible. Factors that influence quick rooting include: proper soil preparation, adequate soil moisture in the underlying soil, and transplanting techniques that will minimize sod drying.
Though sod can be installed at almost any time during the year in South Carolina, it is best to lay during mid-late Spring or in the fall season. If done in the fall, transplanting should be completed early enough to allow root growth into the underlying soil before cold weather arrives. Summertime sodding may result in excessive water use in an attempt to combat the sod drying out during period of hot and dry weather. Winter sodding is done when conditions for root growth are not favorable. The grass may or may not survive the winter, depending on temperatures.
Dampen the soil just prior to laying the sod to avoid placing the turf roots in contact with excessively dry and hot soil. To reduce the need for short pieces when installing sod, it is generally best to establish a straight line lengthwise through the lawn area. The sod can then be laid on either side of the line with the ends staggered in a checkerboard fashion.
A sharpened concrete trowel is handy for cutting pieces, forcing the sod tight but not overlapping and leveling small depressions.
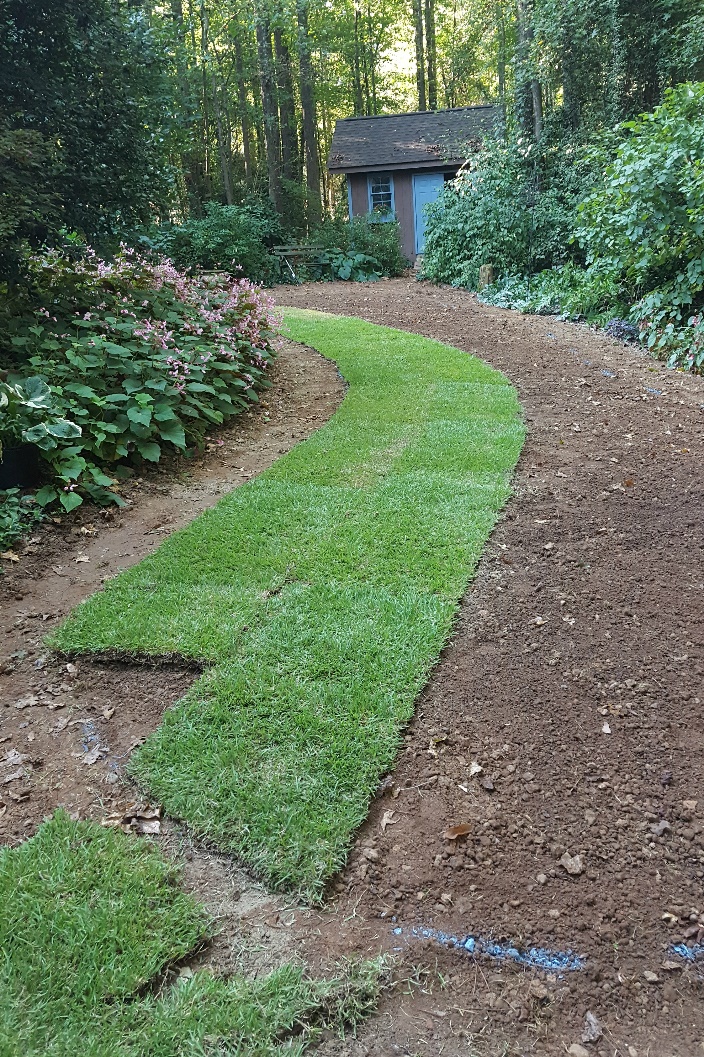
Start with the straightest edge as possible when laying sod, and then work outward from there.
Ground marking paint (blue in this photo) can be used to mark where the sod will be laid and cut.
Joey Williamson, ©2019 HGIC, Clemson Extension

The sod is laid in a staggered fashion for initial stability.
Adam Gore, ©2024, Clemson Extension

Topsoil was raked up against the outer edges of the newly laid sod to prevent drying.
Joey Williamson, ©2019 HGIC, Clemson Extension

Water the newly laid sod lightly once or twice per day, depending upon air temperature and amount of sunlight exposure.
Joey Williamson, ©2019 HGIC, Clemson Extension
Do not stretch the sod while laying. The sod will shrink upon drying and cause voids. Stagger lateral joints to promote more uniform growth and strength. On steep slopes, lay the sod across the angle of the slope; it may be necessary to peg the sod to the soil with stakes to keep it from sliding.
Immediately after the sod has been transplanted, it is important to roll or tamp it. This will eliminate any air spaces between the soil and the sod and encourage quicker root establishment into the underlying soil. Roll perpendicular to the direction the sod was laid.
Care after Transplanting Sod: Irrigate newly transplanted sod to a depth of 4 inches immediately after transplanting to promote deep root growth. In the absence of adequate rainfall, water daily or as often as necessary during the first week and in sufficient quantities to maintain moist soil to a depth of at least 4 inches. The sod should then be watered lightly during midday hours until rooting into the underlying soil has taken place. Do not let the soil dry out until a good union between the sod and soil surface has been achieved. Deeper, thorough watering can then be done as the roots begin to penetrate the soil.
Do not mow until the turfgrass sod is firmly rooted and securely in place. The mowing height and frequency on newly sodded areas should be the same as normally practiced on established turfs. Fertilization of the sod after transplanting should not be needed, since the turfgrass has optimum conditions for growth, and fertilizer was incorporated into the soil before transplanting. Start a fertility program after the sod has established a good root system. Light, frequent applications of soil topdressing will help to smooth out the lawn surface.
Sprigging: Sprigging is the planting of stolons or rhizomes in furrows or small holes. A sprig is an individual stem or piece of stem of grass without any adhering soil. A suitable sprig should have two to four nodes from which roots can develop. Soil preparation for sprigging should be the same as for the other methods of planting.
To plant sprigs, dig furrows 8 to 12 inches apart and place the sprigs at a 1- to 2-inch depth (use the shallower depth if adequate moisture is available) every 4 to 6 inches in the furrows. The closer the sprigs are, the faster the grass will cover the soil. After placing the sprigs in the furrow, cover a part of the sprig with soil and firm. The foliage should be left exposed at the soil surface.

Stolonizing is the broadcasting of stolons over a soil surface which is then pressed into the soil and/or covered with topdressing material.
Adam Gore, ©2024 Clemson Extension
Another method is to place the sprigs on the soil surface at the desired interval end-to-end, about 6 inches apart, and then press one end of the sprig into the soil with a notched stick or blunt piece of metal like a dull shovel. A portion of the sprig should be left above ground exposed to light. Regardless of the planting method, each sprig should be tamped or rolled firmly into the soil. Water after planting. Since the sprigs are planted at a shallow depth, they are very prone to drying out. Light, frequent waterings are necessary until roots become well-established. Watering lightly once or twice daily will be required for several weeks after planting.
Stolonizing is the broadcasting of stolons on the soil surface and covering by topdressing or pressing into the soil. Stolonizing requires more planting material but produces a quicker cover than sprigs. Sprigging and stolonizing often required a highly fertile and sustained damp environment for successful establishment
Care after Sprigging: It is extremely important to maintain a moist surface during the initial establishment from sprigs. If practical, topdress newly planted sprigs at regular intervals.
Plugging: The planting of 2- to 4-inch diameter square, circular or block-shaped cuttings from sod at regular intervals is called plugging. Three to 10 times as much planting material is necessary for plugging as sprigging. The most common turfgrasses that are started by the use of plugs are St. Augustinegrass, zoysiagrass and centipedegrass. These plugs are planted into prepared soil on 6- to 12-inch centers. The closer the plugs are planted together, the faster the sod will cover. However, the closer the plugs are planted together, the more sod it will take to provide plugs to cover the lawn area.
Prior to plugging, prepare the soil the same as that for seeding or sodding. Plugging can be done by special machines designed to plant plugs or by hand on smaller areas. Timing of plug transplanting for warm-season turfgrasses should take place in the late spring or early summer. This will give the turf optimum growing conditions to establish. After the plugs have been transplanted, the soil should be rolled to ensure good plant-to-soil contact. Irrigation should follow the same guidelines as for sodding.
Care after Plugging: Post-plugging care involves mowing at the height and frequency required for that particular turfgrass. A fertilizer application made three to four weeks after plugging enhances the establishment rate. Proper irrigation procedures will also enhance the establishment of a lawn through plugging.
Excerpted from the South Carolina Master Gardener Training Manual, EC 678.
Document last updated on 2/24 by Adam Gore
Originally published 02/99


