
South Carolina is blessed with year-round fresh green vegetables, and winter is for collard greens. They grow best in cool weather, and a brisk cold freeze makes them sweet. Collard greens are rich in vitamins and minerals, especially calcium. Just last week, I was fortunate to find a large bag with three healthy just-picked heads for just $3.00 at the farmer’s market and started planning my first-ever attempt at canning greens.
The first place I look for canning recipes is the National Center for Home Food Preservation. They are known to be safe and tested recipes that cover all the basic fruits, meats, and vegetables. Instructions for collard greens are found on the page for Spinach and Other Greens.
As I started planning the canning project, I looked at the yield. Eighteen pounds makes 9 pints of greens. I only had 6.8 pounds. Some quick math showed that I might get only three pints. I know greens cook down a lot, but comparing the pile of greens to the jars, it seemed unlikely.

Are all these collards going to fit into three jars?
Tamara Dwyer ©2024 Clemson Extension
I discarded the outer leaves, washed the greens three times, and cut away the stems. After cutting away the heavy stems and discarding the tough outer leaves, I only had 3.2 pounds. The mystery deepened. How many jars of collards would I have at the end of the day? A pint-and-a-half? I kept moving forward.
Since I needed to fill the entire canner with jars to keep the jars of collards stable and upright, I got eight jars out, even if I did not fill them all with greens. I used new inner lids and checked the instructions on the box for preparing them—this box said to just wash, not simmer at 185 °F, like the ones I used just last month. With the eight jars in the pressure cooker simmering in hot water on the stovetop, I was ready to start cutting and blanching greens.
My preference is to keep some of the stem and cut the greens in long strips. To do this I roll about five leaves up in a burrito shape, then cut slices.
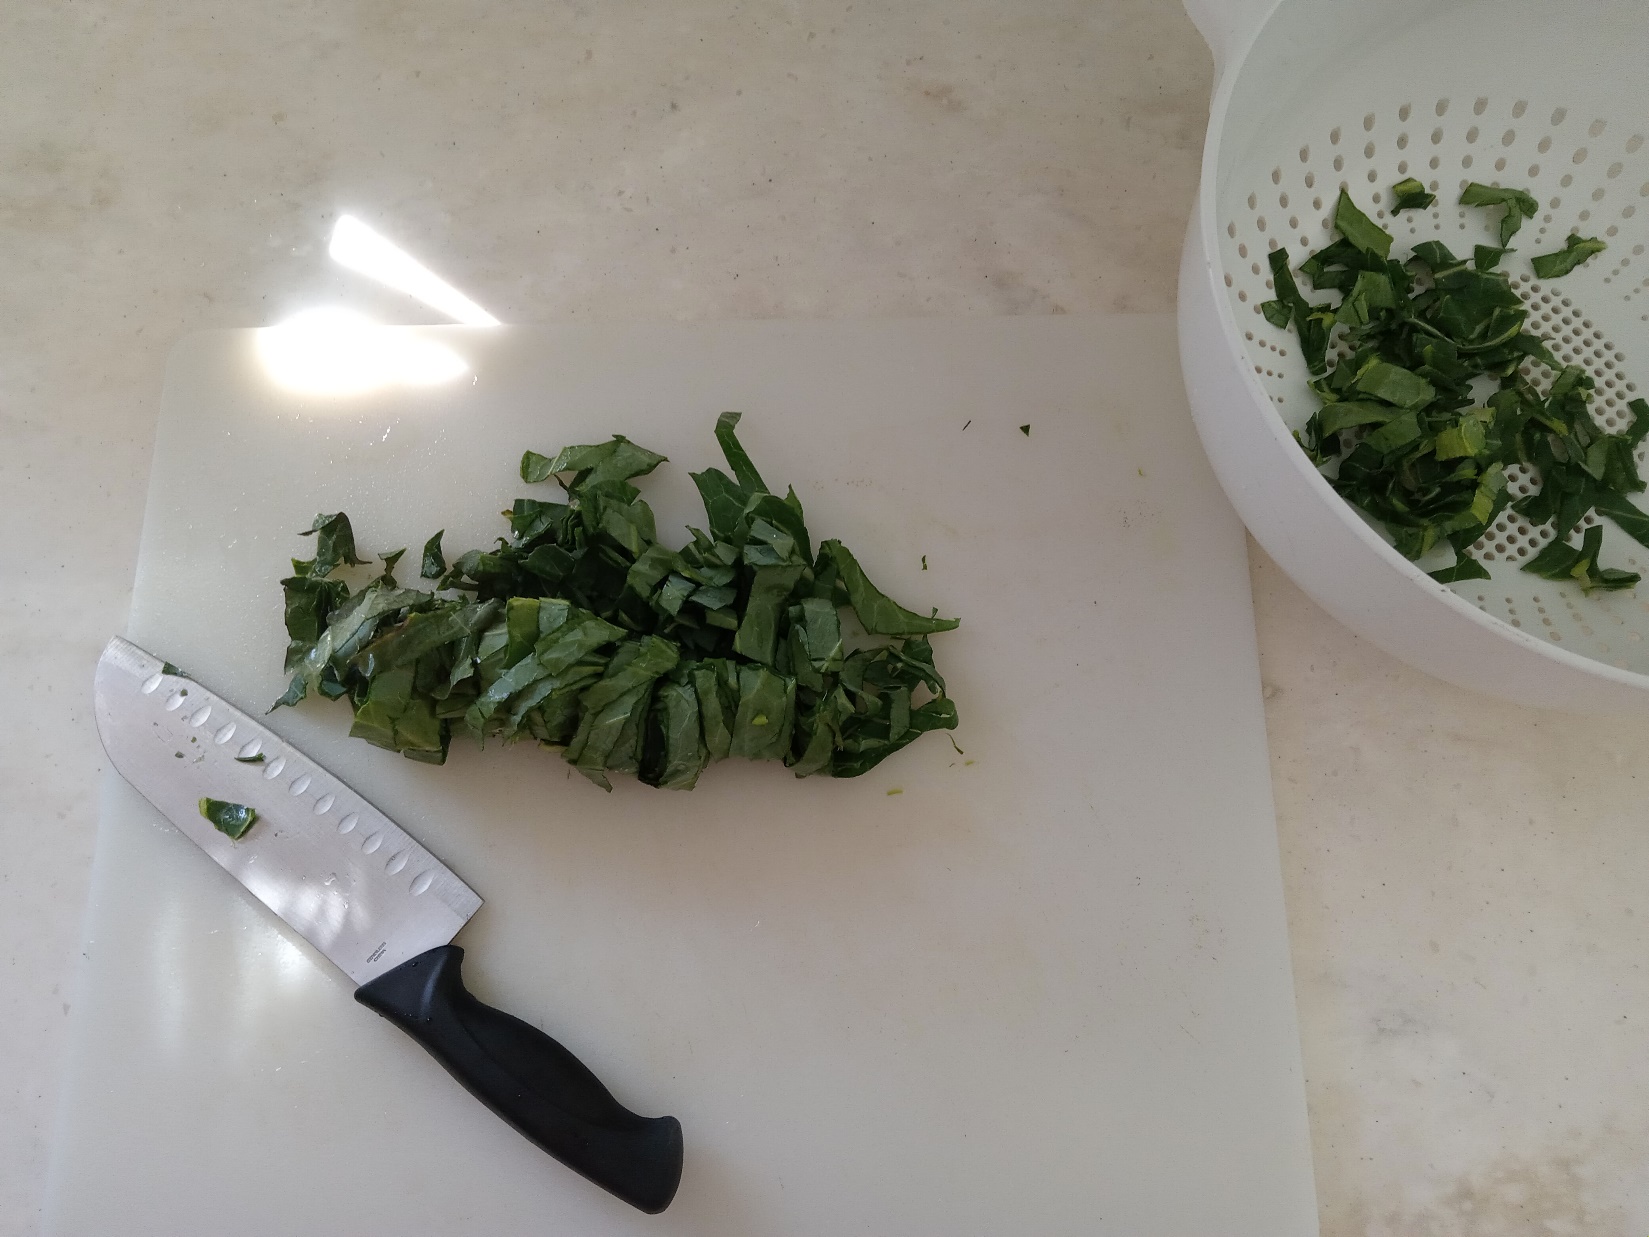
Roll leaves and then slice, known as chiffonade.
Tamara Dwyer, ©2024, Clemson Extension
For the larger leaves, I add a cut along the length of the roll. Then I blanched the greens for three minutes in small batches, and added them to a 4-quart bowl. Blanched, I now had four quarts. A quart is two pints, and four times two is eight, exactly the number of jars that were hot and simmering in my pressure cooker. At this point I washed five more inner lids and rings to meet my expected yield of eight pints.
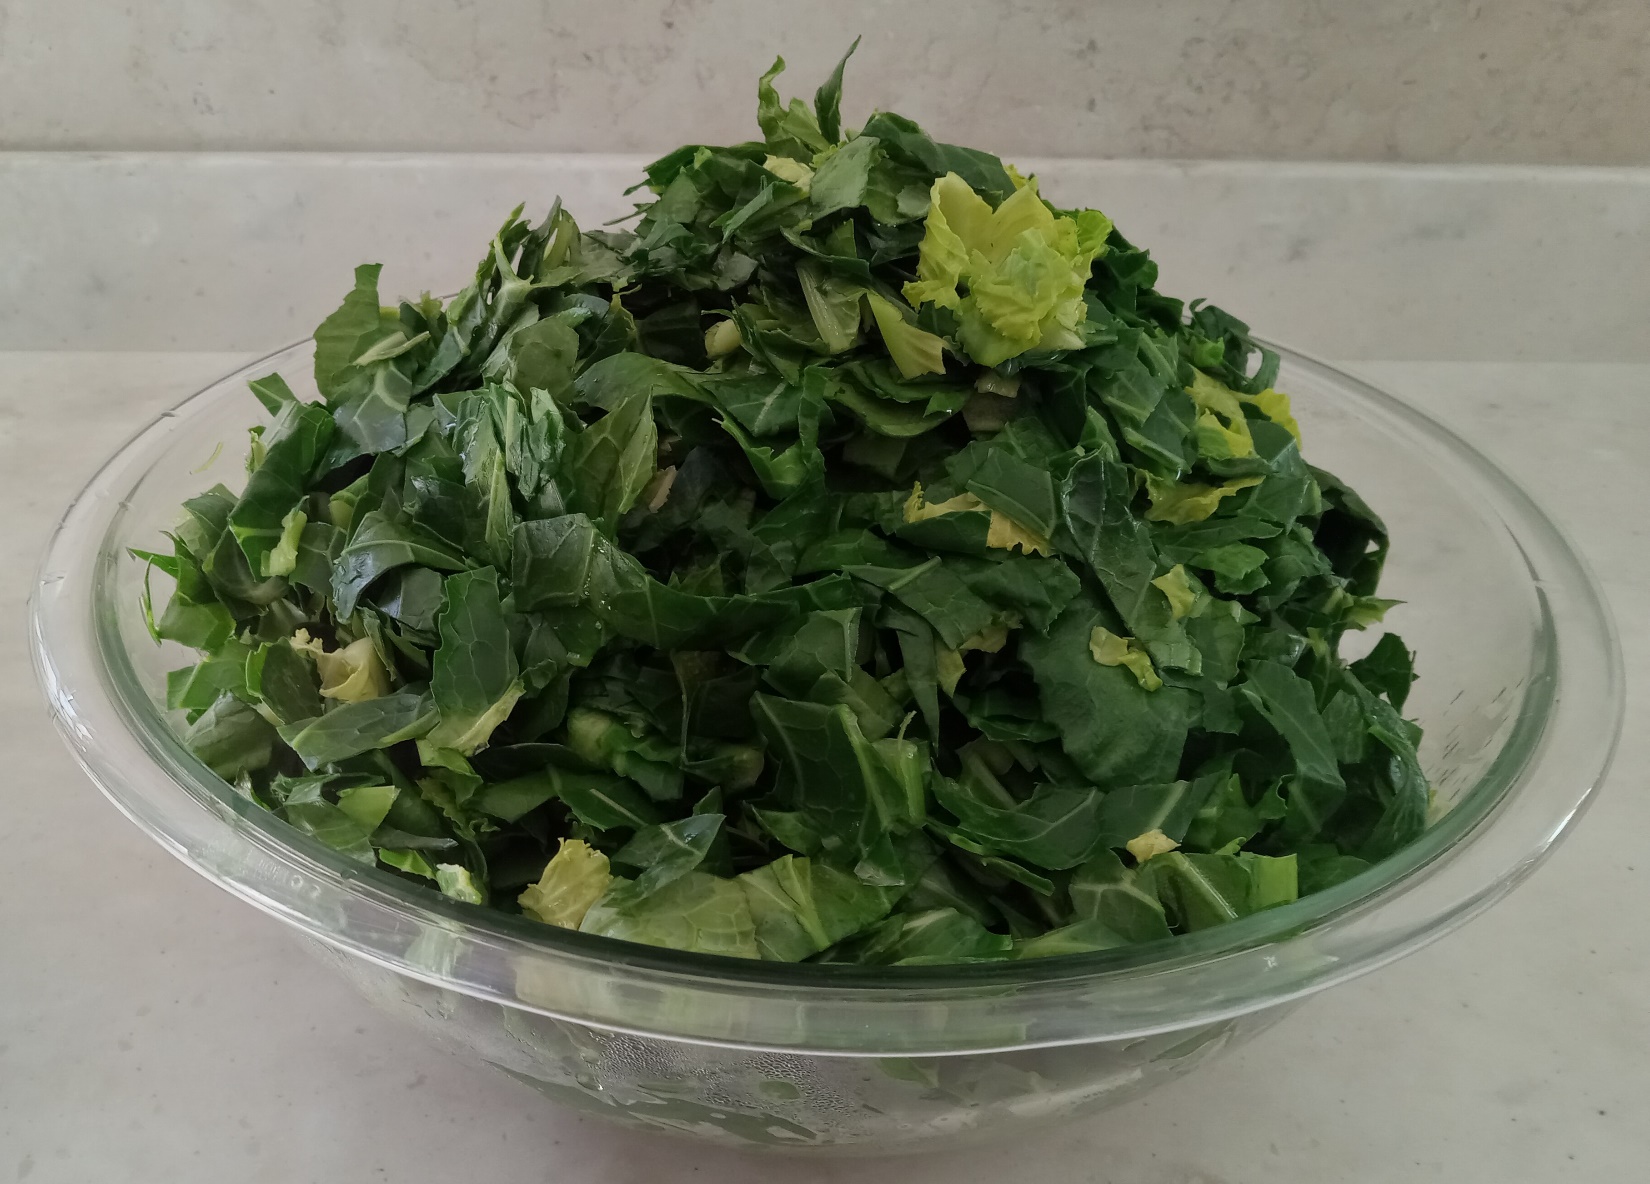
When the greens filled my four-quart bowl, I knew I had more than three pints.
Tamara Dwyer ©2024, Clemson Extension
The recipe says to “fill jars loosely” with greens. I put a little bit of salt in the jar, used tongs to push blanched greens in comfortably full, then filled with water to the one-inch mark. At this point I had to debubble the jars. I am relatively new to canning and had never had a canning project with so much debubbling! Each jar had enough trapped air I had to add more water to get the water level back to 1-inch headspace. I started to get impatient with that process, with the canner filling up with simmering jars and the heat rising in the kitchen. It felt endless, no matter how long I kept working at it, there were still bubbles. I started wiping the rims and putting the lids on to get them into the canner.
With all eight jars filled and placed in the canner, it was time to put the lid on. After the petcock raised, I let a steady flow of steam go for ten minutes, then sealed, placed the pressure regulator in place and let the pressure gauge rise to 11 pounds of pressure for 70 minutes.
When the canner was cool enough to open, the green water in the canner and the water level in the jars indicated that sadly, I had significant siphoning, more than on any other canning project. I carefully lifted the jars out of the canner and set on a towel-covered rack to finish cooling. A few hours later the jars were cool, and two jars didn’t seal at all. I started reading about the reasons jars fail to seal. Since the six jars that sealed were at least half full of liquid, I judged they were safe enough in the pantry but that I would be eating them fairly soon.
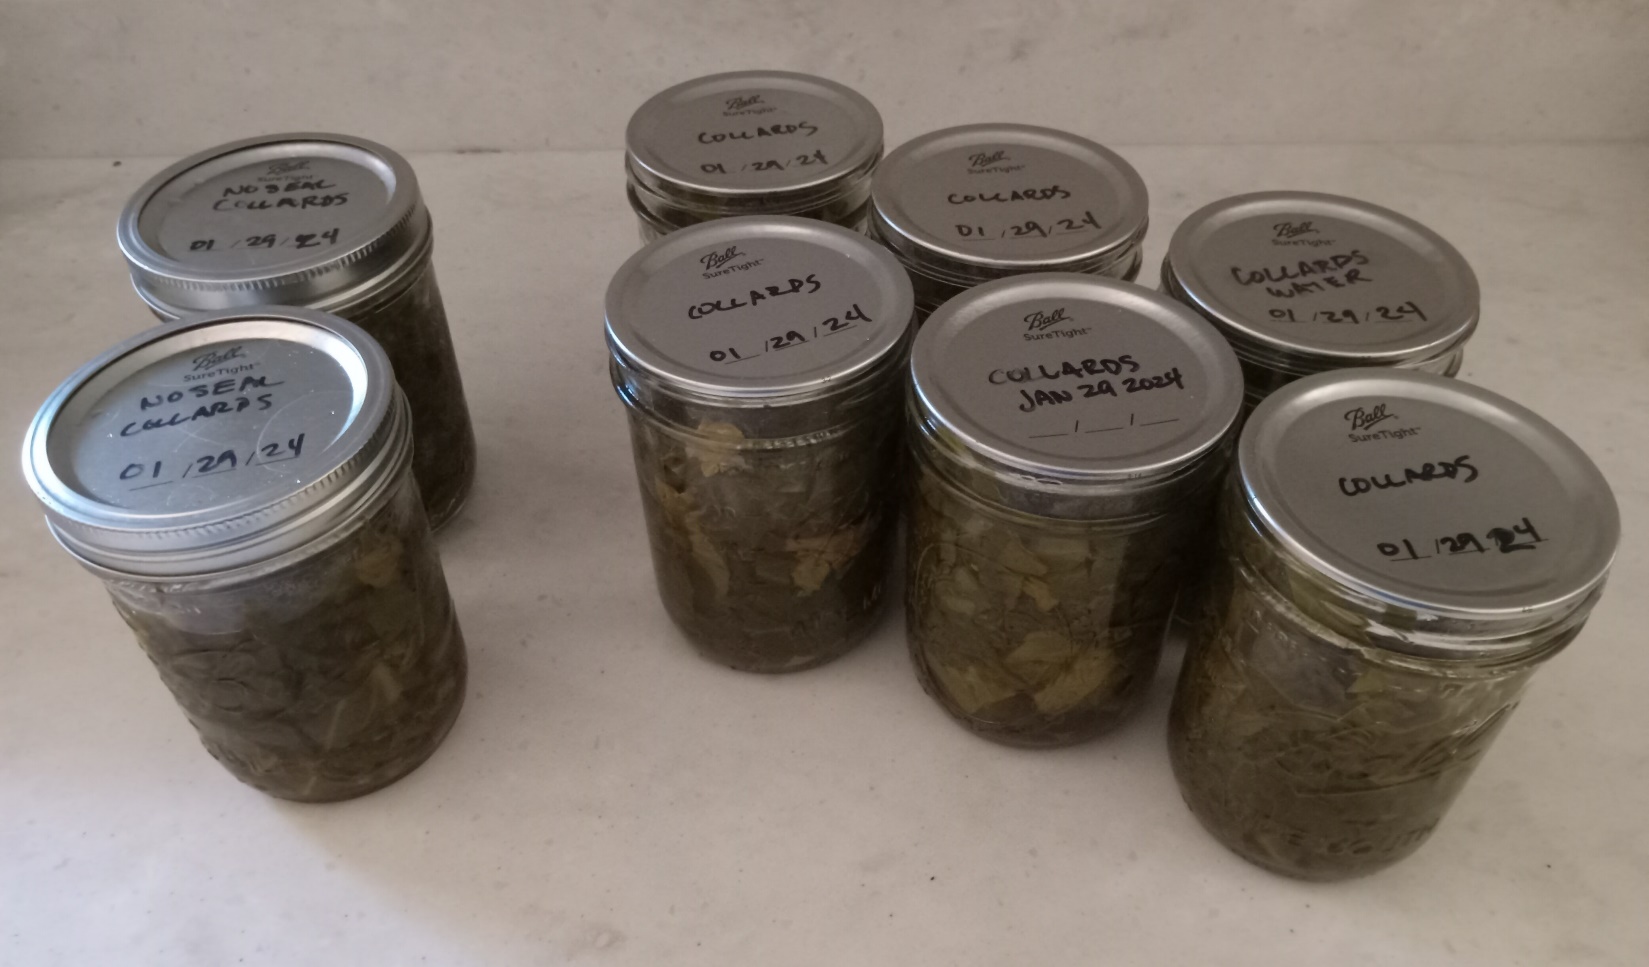
Six pounds of collards in eight pint jars. Two jars failed to seal.
Tamara Dwyer ©2024, Clemson Extension
When the jars were cool, I put the two that failed to seal in the fridge before bed that night, after only about six hours. I didn’t have any hope they would start to seal. When I opened an unsealed jar the next day, it was clear they didn’t seal because, during the siphoning, bits of greens had gotten between the sealing compound and the lid of the jar.

The greens bubbled up and got in the way of the jar sealing.
Tamara Dwyer ©2024, Clemson Extension
However, the greens were tasty with some hot sauce, and the collards were silky and held up well to the canning process. Home-canned collards are good!
In summary:
- Collards are a great bargain in the winter and their thick leaves hold up well to canning.
- Have extra jars ready; it’s hard to predict what a recipe will actually yield.
- You can’t debubble a jar too much. Keep at it until all bubbles are removed to keep siphoning to a minimum so you get a good seal.


