Although straw bale gardening is an ancient practice, it has become a trending gardening technique in the last several years. Straw bale gardens are inexpensive to set up and suited for locations with limited space. The use of a straw bale raises the garden off the ground making it more accessible to individuals with limited mobility or for those wishing to do less bending in the garden. Additional advantages of this technique include easier relocation of the garden space if necessary and the recycling of rich organic material into the landscape once the bale has out lived its use. Straw bale gardening is easily detailed in a few basic steps.
Getting Started

Straw bales (right) are easily purchased from local dealers.
LayLa Burgess, © 2017 HGIC, Clemson Extension

Straw bale size should be approximately 3’x 2’ x 1.5’.
LayLa Burgess, © 2017 HGIC, Clemson Extension
Purchase a rectangular straw bale(s) approximately 3′ x 2′ x 1.5’ in size. Cost per bale is typically $5-$7. Check the bale(s) for possible ant infestations prior to purchase. Ideally, the straw bale should be composed of wheat. It is better to use straw, but not hay. Alfalfa, oats, rye, or other cereals can be considered, if there is an absence of weed seed in the bales. Bales that are free of weed seed, or at least containing limited weed seeds, will only make gardening easier in the long term. Pine needles do not work well due to low absorbency and slow decomposition. Leave the 2-3 strands of string or twine intact. Bales with biodegradable binding made of jute and sisal may be available at some outlets. Binding should be oriented parallel to the ground (cut end of bale facing upwards) and bound tightly.

Place bale with cut end facing up.
LayLa Burgess, © 2017 HGIC, Clemson Extension
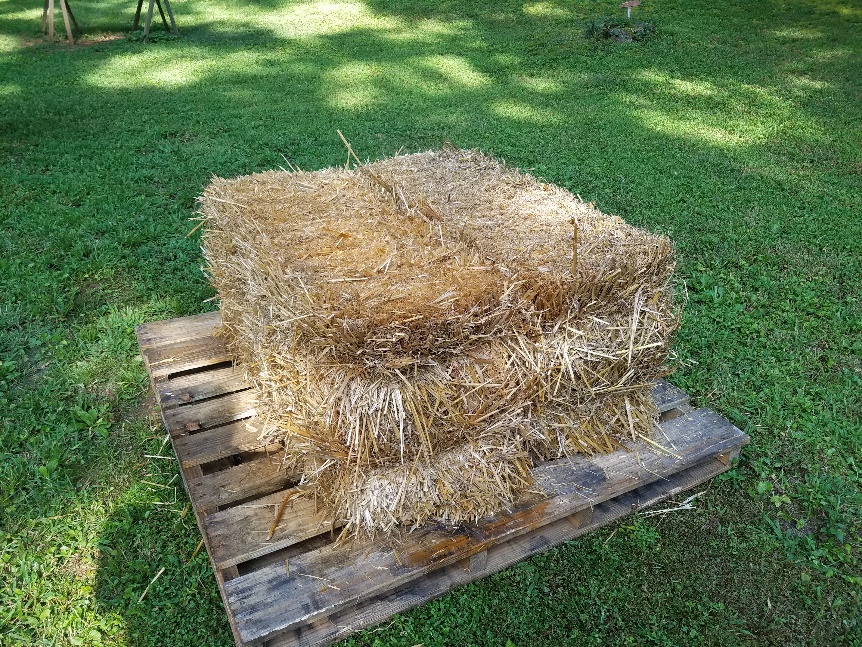
Bales placed on wooden pallets allows for drainage.
LayLa Burgess, © 2017 HGIC, Clemson Extension
Place the bale(s) in a sunny location receiving at least 6 hours of direct sunlight per day. It is recommended to place the bale(s) at least 2 weeks prior to the optimum plant date to allow for conditioning of the bale(s). A variety of foundations can be used for bale placement: concrete, gravel, dirt, sand, turf, or wooden pallets. If needed, place newspaper or cardboard beneath the bale to aid in suppressing weeds from below. If bale(s) are placed on healthy turfgrass, the grass will die and leave a bare spot. Stakes or rebar maybe driven into the ends or around the bale(s) for added stability and anchorage to the ground. Staking additionally aids in holding the bale structure together for the lifetime of the garden.
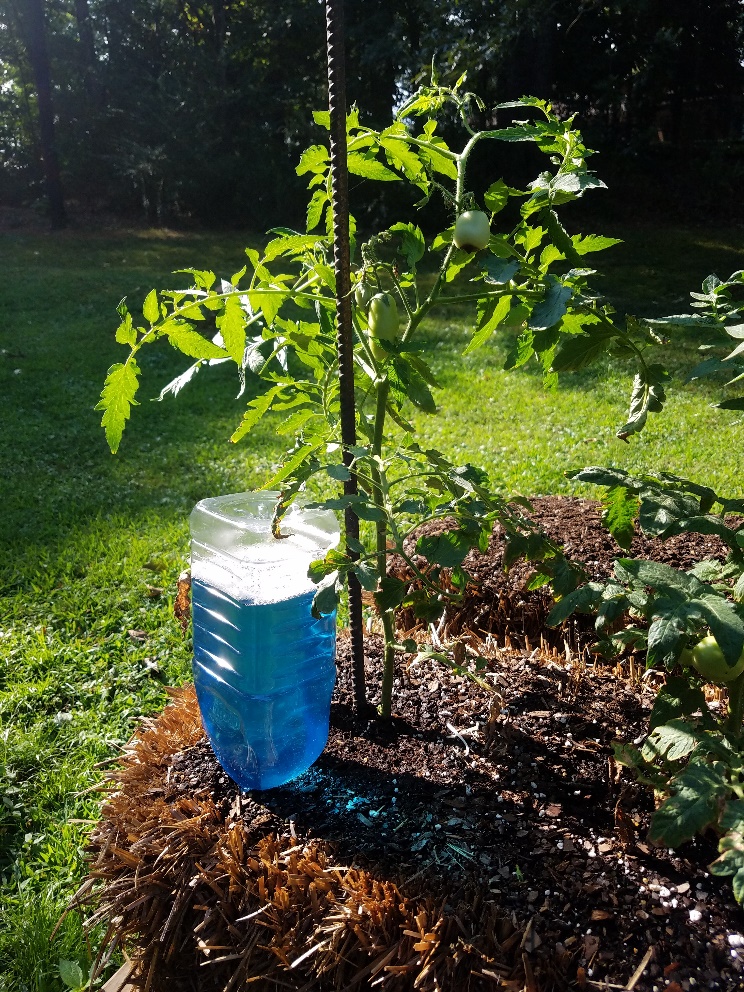
Liquid fertilizer can be added to the recycled plastic container used in the passive irrigation system.
LayLa Burgess, © 2017 HGIC, Clemson Extension
Placement of a drip irrigation or soaker hose with electronic timer across the bale(s) or around plantings can save time and labor when watering is required. Place multiple bales end to end, so that irrigation tubing does not sag between bales and waste water. As an alternative, recycled 2-liter plastic bottles or 1-gallon milk jugs can be used to supply water to the bale(s) passively. Fill desired clean recycled container with water, secure lid that has been previously poked with a series of holes for water access onto the container, and invert (place upside down) into the bale(s) approximately 1 inch away from plants. Water will release slowly to the plants over the course of a day or two depending on hole size and temperature.
Conditioning the Bale(s):
Days 1-3: Water the bale(s) daily (once or twice), keeping it uniformly moistened throughout the bale. Wet the bale until water runs out of the bottom. Since addition of water to the each bale increases the weight (approximate volume 40 gallons), make sure each bale(s) is in the proper location for the season’s garden. As the composting process begins (decomposition within the bale), the interior of the bale(s) will begin to warm.
Day 4: Evenly scatter 2 cups of dolomitic lime (Ag lime or pelletized lime is sufficient) on top of each bale and add either ½ cup of urea (46-0-0) OR 1 cup of ammonium sulfate (21-0-0). Use of urea OR ammonium sulfate is up to the gardener. Stick with the chosen fertilizer for the remainder of the conditioning period and pay close attention to portions used for each. Water in lime and fertilizer until dissolved completely per bale. Moisture should be retained uniformly throughout the bale(s) from this point forward, but it is not necessary to wet each bale until water runs out of the bottom as in Days 1-3. This will help with avoiding nutrient leaching in future fertilizer applications. For organic gardening, blood meal can be substituted for urea or ammonium sulfate to provide nitrogen.
If using urea (46-0-0), proceed with the following directions for Days 5-10.
Days 5-6: Per bale, sprinkle top evenly with ½ cup of urea (46-0-0) each day. Water each bale thoroughly after application of fertilizer to hasten decomposition. No more lime is required.
Days 7-9: Reducing the amount of fertilizer per bale by half, sprinkle top of bale with ¼ cup of urea (46-0-0) each day. Water each bale thoroughly after application of fertilizer, but do not over water to the point of runoff. Excessive watering can lead to leaching and loss of nutrients from the bale(s).
Day 10: Addition of a complete fertilizer is required. Per bale, evenly sprinkle top with 1½ cup of 8-8-8 or 1 cup of 10-10-10 fertilizer. Water in application thoroughly.
If using ammonium sulfate (21-0-0), proceed with the following directions for Days 5-10.
Days 5-6: Per bale, sprinkle top evenly with 1 cup of ammonium sulfate (21-0-0) each day. Water each bale thoroughly after application of fertilizer to hasten decomposition. No more lime is required.
Days 7-9: Reducing the amount of fertilizer per bale by half, sprinkle top of bale with ½ cup of ammonium sulfate (21-0-0) each day. Water each bale thoroughly after application of fertilizer, but do not over water to the point of runoff. Excessive watering can lead to leaching and loss of nutrients from the bales.
Day 10: Addition of a complete fertilizer is required. Per bale, evenly sprinkle top with 1½ cup of 8-8-8 or 1 cup of 10-10-10 fertilizer. Water in application thoroughly.
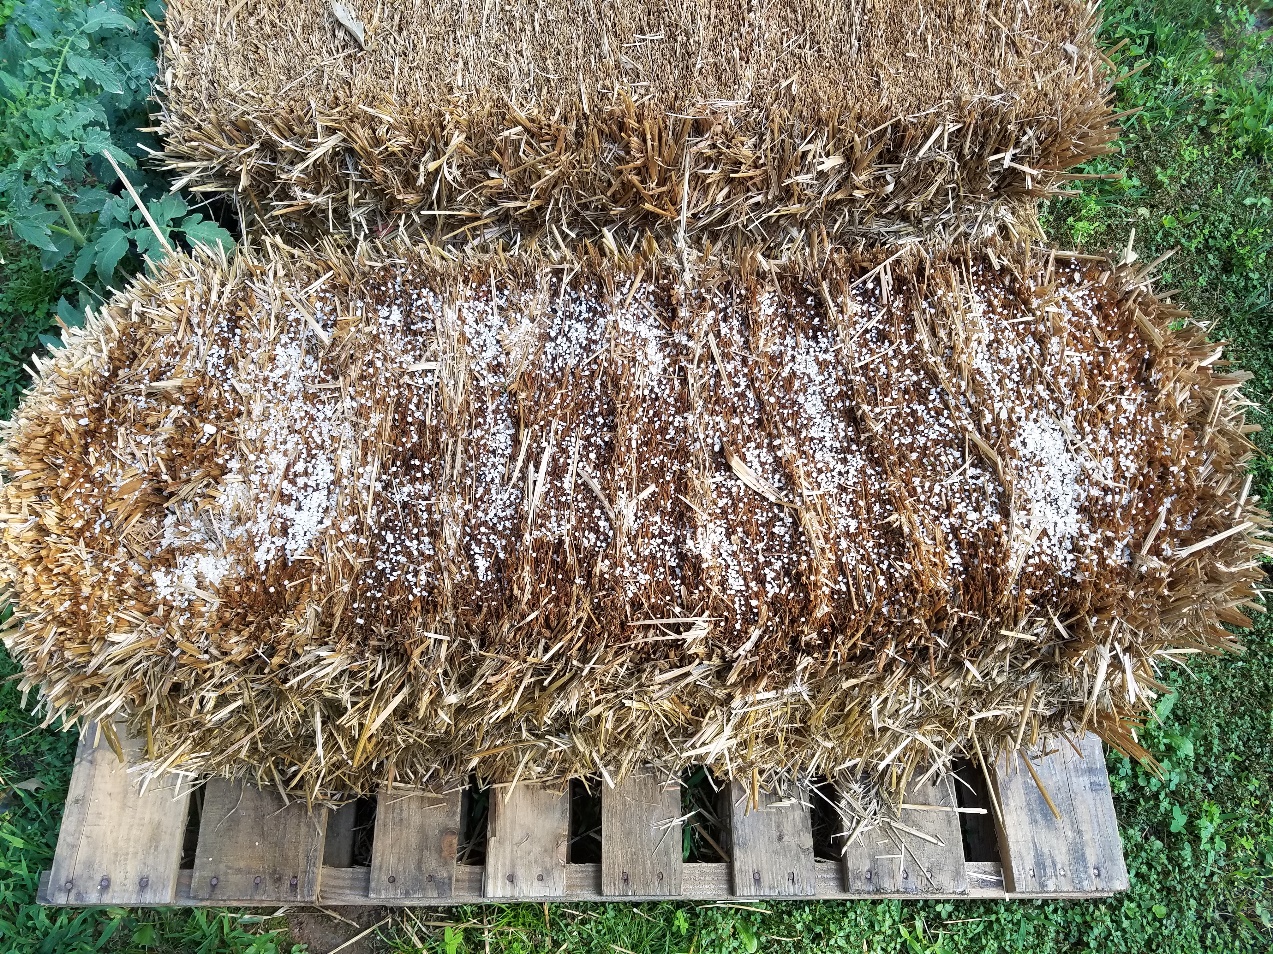
Sprinkle appropriate amounts of lime and fertilizer evenly over the bale. Water each application in thoroughly.
LayLa Burgess, © 2017 HGIC, Clemson Extension
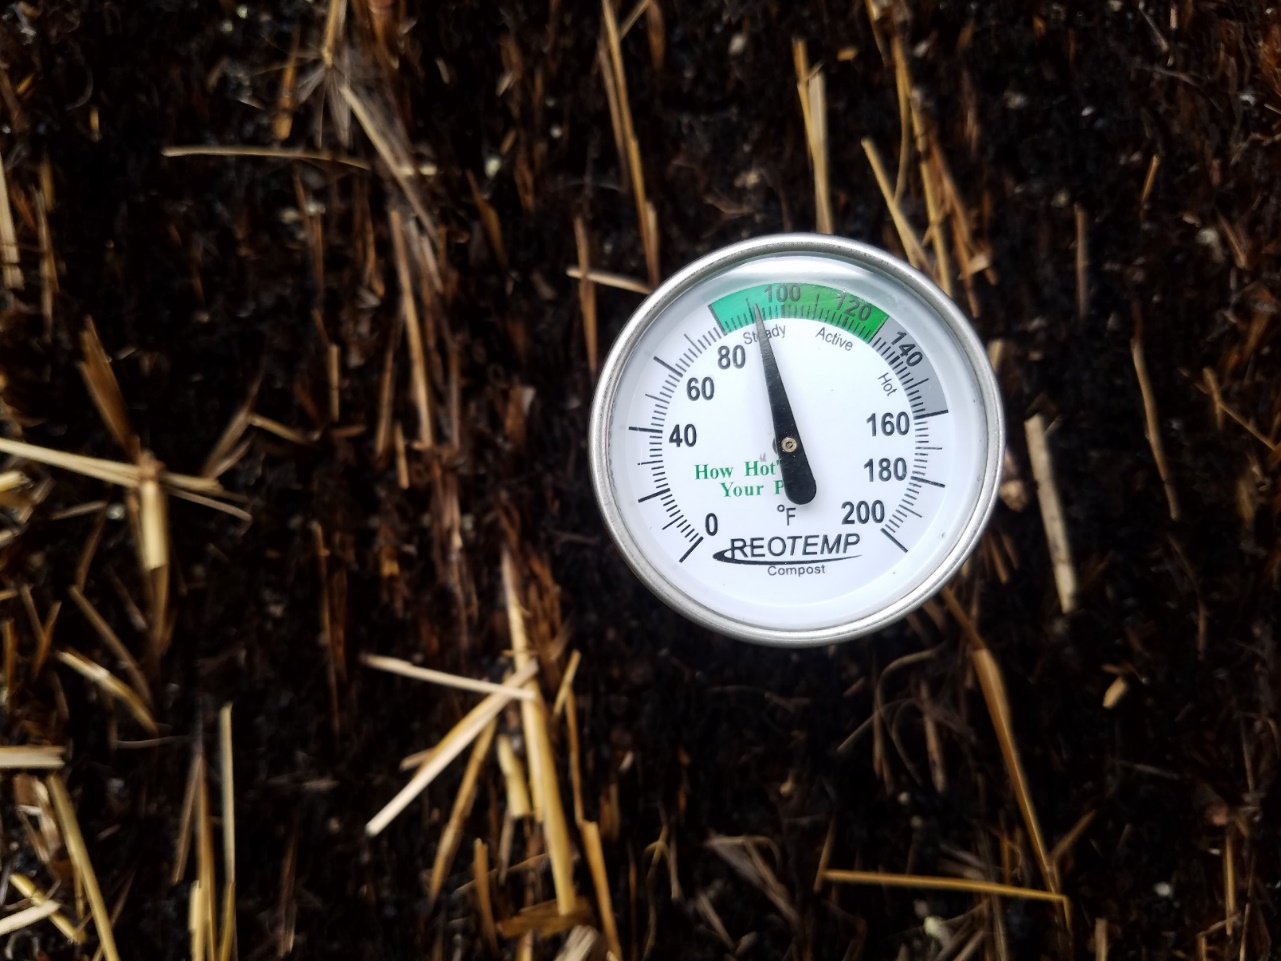
A compost thermometer is useful to determine when a bale has cooled sufficiently for planting.
LayLa Burgess, © 2017 HGIC, Clemson Extension
Once the bale(s) are conditioned (it takes approximately 2 to 3 weeks), it is time to plant. Prior to planting (Day 11), make sure the bale(s) have cooled down internally to 99°F or below (around body temperature or lower). Feel the top of the bale(s) for heat or use a compost thermometer to measure the temperature. Excessive heat may impact transplants or seeds placed into the bale(s). If excessively warm, continue to water each bale daily to retain moisture as needed until internal bale temperature lowers. Once bale(s) have cooled, it is safe to plant.
Planting the Bale(s)
Region specific planting dates for South Carolina are available, see HGIC 1256, Planning a Garden (Table 1). There are a couple of options for planting straw bales depending on the crop of choice.
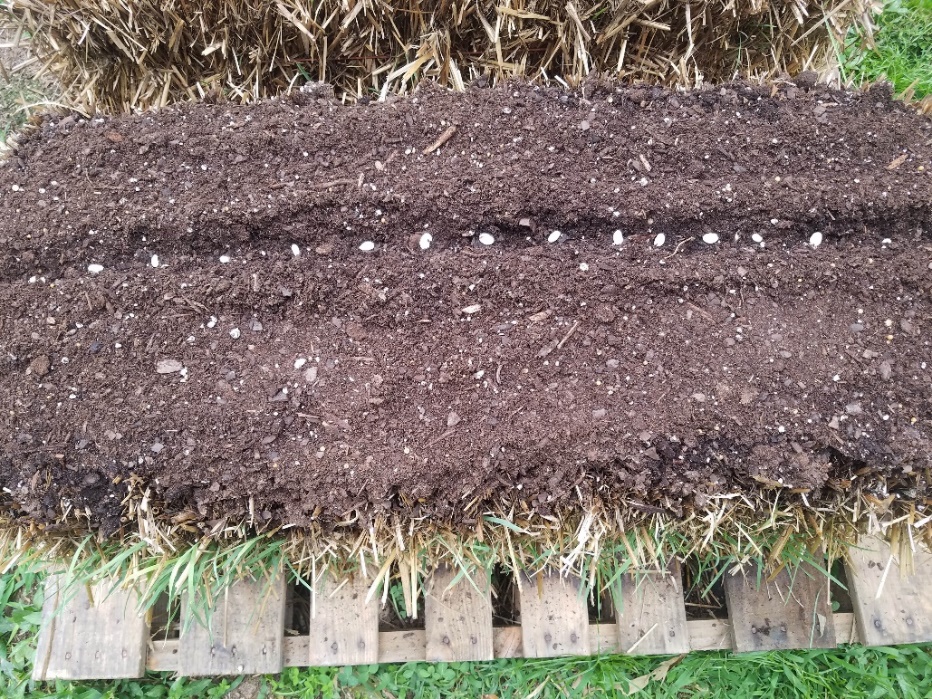
Place seeds at appropriate depth and spacing when using the flatbed planting method.
LayLa Burgess, © 2017 HGIC, Clemson Extension
Method 1: Flatbed planting.
Place approximately 2 to 4 inches of growing medium across the top of the conditioned bale(s) creating a “flatbed” and moisten with water. This method works well for direct planting of seeds, such as beans; however, seeds can be planted using the pocket/divot hole method detailed below. Place seeds at the recommended planting depth whether planting with the flatbed method or hole method. For more information on planting depth, see HGIC 1256, Planning a Garden (Table 1).
Method 2: Planting in holes (pockets or divots) within the bale.
This method is ideal for placing transplants, but if planting seed remember to plant at the depth recommended on the seed packet. Dig approximately 6×6 inch holes down into the bale(s) appropriately spaced for plantings. Depth of the hole will depend on the crop planted, the depth it was previously grown if a transplant, or recommended depth for seed. A small handheld pruning saw can be used or simply excavate the hole with your hand or garden trowel (safe method if working with children). A series of holes is created based on number of plantings per bale. Once a hole is dug, place transplant (preferred) or seed (at proper depth), and fill remaining space with growing medium. The 6×6 inch hole is a good guideline; however, most crops have a recommended planting depth that should be followed for transplants as well as seed. The hole or pocket/divot method works well for planting transplants as you would in the ground.

Divots can be dug easily with a hand trowel.
LayLa Burgess, © 2017 HGIC, Clemson Extension
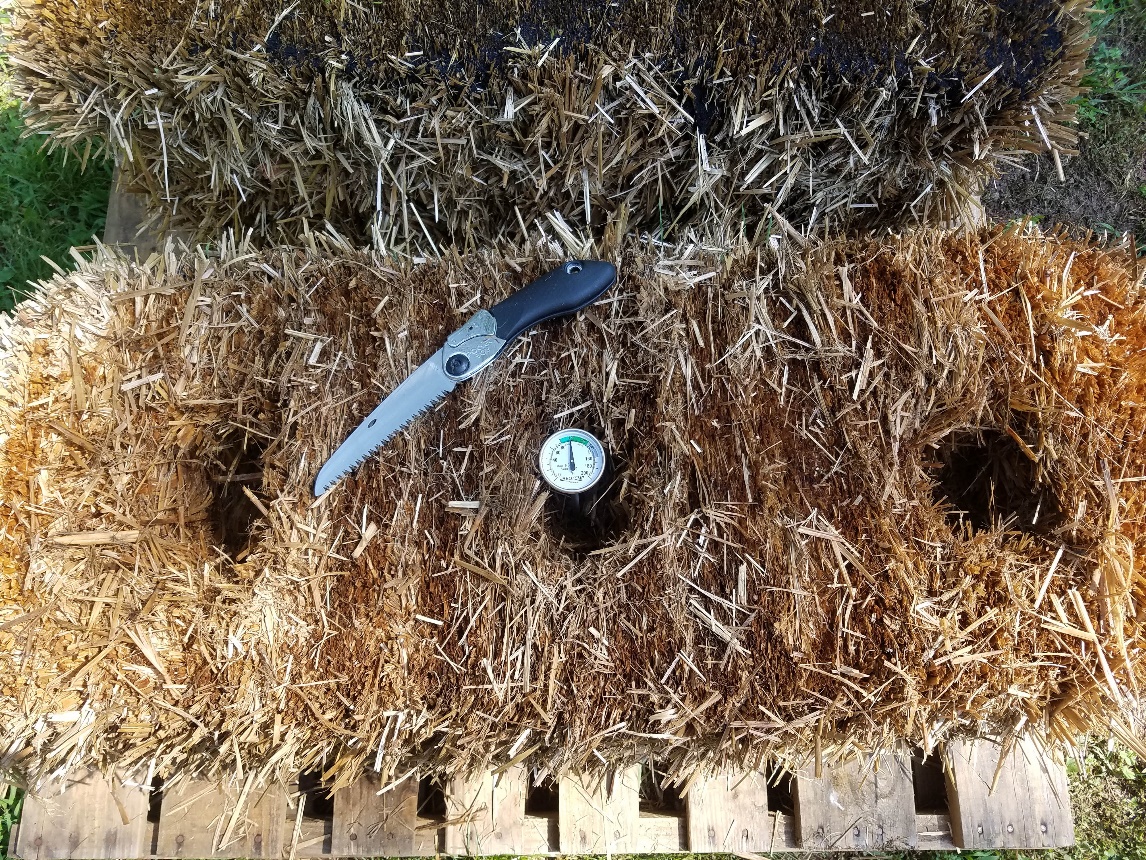
Small hand saws work well for cutting divots into a bale for planting.
LayLa Burgess, © 2017 HGIC, Clemson Extension

Place appropriate number of plants or seeds per bale.
LayLa Burgess, © 2017 HGIC, Clemson Extension
Regardless of the planting method used, addition of growing medium gives plants a suitable rooting matrix for establishment and production. Various growing media are acceptable. Commercial quality potting soil can be used alone, or may be mixed with aged manure at a 1:1 mix ratio. Store bought compost is a good option. Alternatively, home cured compost can be used, if it is sufficiently decomposed and free of weed seeds.
Root crops such as potatoes, carrots, and onions can be grown with added attention, but may be more difficult. Corn and okra are not good candidates for straw bale gardening because they tend to grow tall, have a tendency to root shallower than needed, become top heavy, and may encounter pollination restrictions with low numbers of plants grown. Tomatoes may require staking opposed to cages for better support. Bush tomatoes (determinate) and beans may do better than vining tomatoes (indeterminate) and beans, though trellises can provide space for vining species.
Table 1. Guideline For Number Of Plants Per Bale In Straw Bale Gardening
| Plant Type | Plants per Bale | Additional Information* |
| Beans | Package directions | See HGIC 1302, Bush & Pole Type Snap Beans |
| Cantaloupe | 1 | See HGIC 1304, Cantaloupe & Honeydew Melons |
| Cucumber | 1-2 | See HGIC 1309, Cucumber |
| Eggplant | 2 | See HGIC 1310, Eggplant |
| Lettuce | Package directions | See HGIC 1312, Lettuce |
| Peppers | 2 | See HGIC 1316, Pepper |
| Squash (summer) | 1 | See HGIC 1321, Summer Squash |
| Squash (winter) | 1 | See HGIC 1318, Pumpkins & Winter Squash |
| Strawberry | 3-4 | See HGIC 1404, Strawberry Types |
| Tomato | 1-2 | See HGIC 1323, Tomato |
| *provides extra useful information, factsheets are not written for straw bale gardening | ||
For trellis construction, place 5 to 7 foot tall posts at the ends of one or more straw bales in a row. Run wire or string from post to post at 10 inch spacing intervals from the top of the bale(s) up as in Diagram 1. Addition of clear to opaque plastic tarps draped over the top wire can create a cold frame for protection in the early season, as illustrated in Diagram 2. Make sure tarps are tied off appropriately to prevent contact with plants. Contact could lead to potential cold damage.
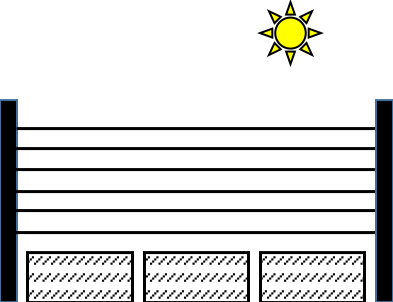
Diagram 1. Trellis design for multiple straw bales.
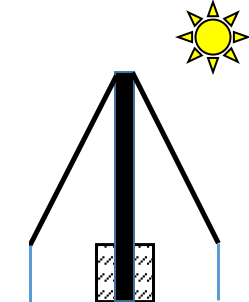
Diagram 2. Approximate tarp placement.
Straw Bale Maintenance
Once transplants or seeds are planted, garden maintenance proceeds as it would with an in ground garden or raised bed, but with a few exceptions.
Irrigation Maintenance: The bale(s) needs to be monitored daily for moisture. The zone immediately around the plants needs to stay moist. Do not allow this area to dry out. Watering may be required daily, depending on drainage and temperature. Placement of a timed soaker hose or the passive recycled water bottle method previously mentioned will help save time and labor. The outside edges of the bale may be allowed to dry out to some degree, but the internal moisture needs to be retained.
Fertilization Maintenance: As plants begin to grow and mature, they will require additional fertilization. Nutrient leaching can occur in straw bale gardens resulting in plant nutrient deficiencies. Complete fertilizers, such as 8-8-8 or 10-10-10, is an option for maintaining plant health. Evenly apply ½ to 1 cup of fertilizer per bale each month and water in adequately. Liquid fertilizers may be added to the passive recycled watering bottle system for dispensing. Organic gardening options include the addition of bone meal, fishmeal, blood meal, compost, or manure that release nutrients at slower rates than most inorganic fertilizers.
Weed Control: As long as the bale(s) are fairly weed free and any added compost has limited weed seeds, very few weeds should present themselves. Monitor bale(s) for emerging weeds and remove them as quickly as possible. If bale(s) are placed on existing turf or a naturally weedy area, place a barrier, such as newspaper or cardboard, beneath the bale(s) prior to conditioning.
Insect Control: Ground dwelling insects and nematodes tend to present problems during the growing season in most vegetable gardens. Straw bale gardens raise plantings off the soil surface, likely presenting fewer problems from insects that spend time at ground level such as cutworms. Since straw bale(s) are generally used for only one season before being recycled, this is often enough time to break the lifecycle of most garden insect pests and reduce problems in subsequent years. As with any garden, Integrated Pest Management (IPM) can be a useful tool. For more information, see HGIC 2755, Integrated Pest Management.
Disease Control: Raised straw bale gardening helps protect against common soil borne diseases that may be prevalent in some areas such as some wilts. Consider purchasing disease resistant transplants for further protection against potential disease. Bale(s) often need watering daily to retain moisture; however, do not over water to the point of creating an excessively moist, humid environment for disease to proliferate.
Recycling the Straw Bale(s): Most straw bale(s) have one, possibly two, growing seasons in them. Spent bales should be recycled into compost bins. Bales can be safely recycled because straw bale gardening typically needs little, if any, pesticides.
Straw bale gardening can have many advantages and few disadvantages if done correctly. Do not place bale(s) in close proximity to a home as to attract unwanted rodent problems. If planning a vacation, be sure to have someone water the bale(s) to retain sufficient moisture throughout the growing season. Rehydration of a bale that is allowed to dry out may be difficult. As a precaution, be aware of nearby runoff from areas treated with pesticides that may be absorbed by the straw bale. Herbicides, such as those applied to lawns, could cause adverse effects to plants. It is acceptable to see mushrooms growing as long as it is not in excess. The edges of the straw bale are often unused space where annual flowers and herbs can be placed for added attraction and enjoyment.
Originally published 08/17